Tensor.Art

Creation

Get start with Stable Diffusion!

ComfyFlow

ComfyUI's amazing experience!

Host My Model

Share my models,get more attention!

Online Training

Make LoRA Training easier!
795094937493352415

RealAnime/动漫牛马

19K
806597323783365848

HelloKitty平静的疯感

21

3DVideo/3D视频

4K

Make your pictures come alive with CogVideo-5B

26K

Western Vintage "XMas & Happy New year" Edition | FLUX

2.2K
806476910080178240

Christmas Outfit

54
805165420341602663

Arcane Flux

260
775496361771594264

Flux dev x Tensor

480K
719565983383231478

Midjourney Replica Pro XL

14K
761123154931231668

HHM FLUX Interior Designer

227
760171205494904096

🌺Flux1-dev+Upscale (Ver. kei)🌺

5.6K
801837894428853595

乌萨奇冲冲冲/Usachi Go

5
715788070019977993

Pony Vision

3.6K
727591761136057773

TATTOO Yourself !

2K

HHM XL 室設轉風格B (img2img)

345
753601670778269655

2 images Mixer (IPAdapter)

7.8K
784551011839807832

Character Sheet Creator

661
806104016709990421

Image to video

22
777125730644425283

A caricature is easy

398
777100184179090341

PRO Sticker by Flux!

871
738653359212489608

Stable Diffusion 3 (SD3) Medium Basic

18K
719099820517770838

DreamShoes - Trendy shoe designer

271
759807567793928262

Realistic to Anime | 1 click Flux

1.3K
757285361134094668

Photo To Ghibli Style

1.4K
802900787150954853

Flux 1.1 Turbo 60step

84

HHM XL 建築轉風格B (img2img)

266
786165709089717195

HALLOWEEN2024 Theme Flux

23
708327063286970738

You will be Pixelated! [ Face Swap ]

3.4K

View All AI Tools

Models

792322768046910954
LORA SD 3.5 L
EXCLUSIVE

3D render Style | SD3.5L-v1

3.6K 108
784775531250981589
LORA Flux
EXCLUSIVE

RealAnime-Detailed V2

32K 977
787352489902023852
CHECKPOINT Illustrious

Illustrious-XL-v0.1

20K 621
800929826673343256
LORA Flux
EXCLUSIVE

New Year and Christmas Post-V.1

3.3K 161
805480559267571426
LORA FluxUpdated
EXCLUSIVE

Miniature World - TDNM-PRO-1

557 99
745555500516521088
CHECKPOINT Pony
EXCLUSIVE

Sym-Pony world 2.5D/Semireal-v1

333K 1.7K
802119373700702135
LORA Flux
EARLY ACCESS

Snow Globe - Snow Ball-FLUX V0.1

671 88
805113945158501093
LORA Flux
EXCLUSIVE

Flux Arcane Style -v1

1.7K 100
801579221429354104
LYCORIS Flux
EXCLUSIVE

[FLUX] Yuletide Glow ChristmasWalkthrough -Ho ho ho!

742 76
764681969138299021
LORA Pony

Samdoesarts Pony-pony

1.6K 84
804906532593697436
LORA Flux
EARLY ACCESS

FLUX [ Theme Girl(Flower/Fruit/Vege) ]-3D rendering

291 28
755714614295243985
CHECKPOINT Kolors

Kwai-Kolors/Kolors-unet.fp16

2.9K 133
759153856602078800
LORA HunyuanDiT

Magic Land-Hunyuan DiT Lora-v1

331 6
769610572959322883
LORA Flux

Faeothic - (Fae-Gothic-Lowbrow) - [FLUX] | DAM-Flux.1 D - V1

1K 57
756613933206397238
LORA HunyuanDiT
EXCLUSIVE

Apolographic-v1.08

944 30
757160867226799215
LORA HunyuanDiT
EARLY ACCESS

TQ - HunYuan Sketchy Pastel Anime-v.1.10

1.1K 92
768769429384411875
LORA Flux

Cyberpunk Anime Style-Flux.1 D v1

4.5K 442
801442198836012580
VIDEO CogVideoX 5B

CogVideoX 5B-v1

0 30
684621923314907702
LORA SD 1.5

Dorohedoro Style-v1.0

24K 292
753527217520342550
LORA HunyuanDiT
EXCLUSIVE

Softer Color HunyuanDiT-V0.1

1.9K 21
758690455404815122
LORA HunyuanDiT

Retro Visual Design-v1.0

550 37
758452720375079303
LORA HunyuanDiT

Medieval Interior HunyuanDiT-v1.0

218 19
769846023070724102
LORA Flux
EXCLUSIVE

TensorArt Logo-FLUX V0.1

1.3K 67
806142628476315316
LORA Flux
EARLY ACCESS

Jam on Toast|Flux-v1.0

0
760601887646074217
LORA SD3
EARLY ACCESS

Cognify-v1

270 15
805916038891031893
CHECKPOINT IllustriousUpdated
EXCLUSIVE

AniPonyXL -illustrious v1

305K 2.1K
756502899707816641
LORA SD3

HH-Newcolony_SD3-V10

1.2K 28
771037034677595951
LORA Flux

TanTengPho-2024-09-08 04:25:43

565 41
773161544545499071
LORA Flux

Lora-Dalcefo_Flux1.Dev-KS-v2-222222

2.8K 137
698544712639984651
LORA SD 1.5

Pluto (Disney)-v1.0

3.5K 133
772893972377984374
LORA Flux
EXCLUSIVE

Hands And Body Repair| Flux-V1

458K 1.5K

Workflows

Articles

How to Use the Christmas Postcard Maker Tool - (AI Tool)

How to Use the Christmas Postcard Maker Tool - (AI Tool)

You can visit the following site: https://tensor.art/template/804202454299301368This tool makes it easy for you to create Christmas greeting cards. It’s perfect for your classic postcards or your social media, like greeting posts on Instagram. How to use?Look at the your right-hand sideBefore clicking 'Go,' you can adjust the 'Element, Type of Postcard, and Greeting'Elements button to add the decoration you needPostcard type Button to add the type of postcard you wantGreetings button to add greetings that will be written, you can make it with your own costume, it's betterWait for a moment, and you’ll see the result.このツールを使えば、クリスマスのグリーティングカードを簡単に作成できます。クラシックなポストカードにも、Instagramのようなソーシャルメディアの投稿にもぴったりです。使い方は?画面右側を見てください。「Go」をクリックする前に、以下を調整できます:要素 (Elements): 必要な装飾を追加ポストカードタイプ (Type of Postcard): 作りたいポストカードの種類を選択挨拶 (Greeting): カスタムで作れば、さらに素敵なメッセージが完成します!数秒待つと、結果が表示されます。ぜひ、この便利なツールを使って、素敵なグリーティングカードを作ってみてください!
16
1
解説★AIツールのラジオボタン★AI Tool

解説★AIツールのラジオボタン★AI Tool

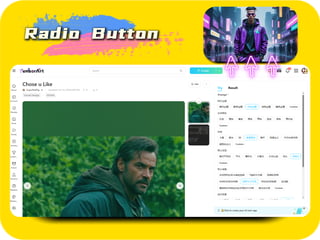
遅くなりましたが、イベントのお題であるAIツールラジオボタンを解説します。ラジオボタンって何?こういうのです。いくつかの選択肢とカスタムボタンが表示されます。さっそく作っていきましょう。comfyuiの設定ラジオボタンが利用できるノードと利用できないノードがあります。僕はpromptlistというノードをよく使うのですが、このノードはラジオボタンを設定出来ません。なのでtextノードを繋げています。textノードはjjkがオススメです。textノードですが実際はtextboxノードに相当すると思われます。AIツールページの編集このように設定画面の右に「編集」の文字が出てきたら成功です。それでは設定していきましょう。プロンプトの編集画面入力方式で「ラジオボタン」を選択して、「追加」します。フォルダ管理のような画面になります。この場合だと「Action」がラジオボタンの名前になり、「jogging」が追加されます。ラジオボタンの追加ラジオボタンは選択肢に入ってないものも作成出来ます。上段が表示名、下段が実際に記入されるプロンプトになります。ラジオボタンの削除僕のようなタイプは少数派かもしれませんが、既定のプロンプトに興味がないです。「jogging」を消します。最初に一つ選択するのは必須の動作になっていますが、このように削除することが可能です。べっべっべっと追加します。ちなみに2つめの何も書いてないラジオボタンはスペースが入っています。僕のアニマジンAIツールは別にアクションを指定しなくても機能します。完成!はい!完成です!後はまぁ適当にチェックしておくといいです。AIツールは誤作動が多いように感じます。それでは、みなさん頑張って下さいネ★
6
Know-how for prompt when you use AI tool - subtitle: make your own style

Know-how for prompt when you use AI tool - subtitle: make your own style

This article will help you to make your own style. I want to share information what I found, and people doesn't know well.There are 3 parts,1. Understanding promptQuality ModifierQuality Modifier Score Criterion masterpiece > 95% best quality > 85% & ≤ 95% great quality > 75% & ≤ 85% good quality > 50% & ≤ 75% normal quality > 25% & ≤ 50% low quality > 10% & ≤ 25% worst quality ≤ 10%Year Modifier - you can put year 2024, 2023 to make more detail style, it could help to make your own style.Year Tag Year Range newest 2021 to 2024 recent 2018 to 2020 mid 2015 to 2017 early 2011 to 2014 oldest 2005 to 2010Aesthetic tagsAesthetic Tag Score Range very aesthetic > 0.71 aesthetic > 0.45 & < 0.71 displeasing > 0.27 & < 0.45 very displeasing ≤ 0.272. Using illustrator's nameThis is main part of this article. you can put & make combination pro illustrator's name to make your picture unique.<No labels>(yoneyama mai:0.5),(WANKE:0.5),(noyu (noyu23386566):0.5)(houkisei:0.5),(umehara sei:0.5)(yunsang:0.5),(ningen mame:0.5),<naga_u,[tyakomes],henreader,baku-p,>Maybe I should make more colorful images.. to show you dynamic differences, but what I want to tell you is using illustrator's name is effect on your work, and It changes atmosphere, character's face, light effect, clothes and background details. Find illustrator's combination will help you to make your own style. I heard using 3~4 illustrator's names is nice, but I didn't test yet. It has many variation with loras..3. last one is tip. how to fix your art.I recently found how to fix the art. When you make your AI art, there might be some details you don't like. You like entire atmosphere of the art, but maybe the character has 6 fingers, character's eye is wrong, many legs... I will tell you how to fix it.remix your entire art prompt.'copy the seed' - very importantput more prompt to fix the details, or changes VAEremake it.I didn't like the character's eyes, so changed VAE, put some promptsIt fixed.
7
[REYApping] Simple and Brief Explanation of AI Tool

[REYApping] Simple and Brief Explanation of AI Tool

Hello and welcome to the third edition of REYApping, a space where I write a bunch of nonsense. Without further ado, let's begin.Never in my entire Tensor life would I actually try to explain something. But here we are, an article about AI tool. What is AI Tool? Why make an AI Tool? How is it different from the "create mode"? I'll try to explain them.What is AI Tool?Now, I might be wrong here (roast me in the comment) but here's my answer: AI tool is a simplified, more straightforward interface of a comfyui workflow. It saves you from seeing bunch of tangled spaghetti that can potentially break your eyes and mind. Instead of customizing directly on the workflow nodes, you get a similar interface as the "create mode". The downside is that it can have limited parameter since those are set by the tool's creator, and you won't know how the workflow works. Also it suck your credits and soul (Riiwa, 2024), but sadly doesn't suck your coc- *cough* Nevermind that last part.Here's an image of comfyui workflow:Here's when that workflow is made into an AI Tool:Why Make an AI Tool?Simplicity and straightforwardness in the palm(?) of your hand. That's it. Especially if your flow has a few variables that can be modified such as prompts, steps, etc.. If your flow has a lot of modifiable variables and/or you want more control over your workflow, then I suggest you do that directly in the comfyui.How is It Different from Creation Mode?Creation mode allows you to control basic functions such as samplers, which T5 would you use, and other thing like ADetailer, img2img, controlnet, etc.. AI Tool, while it can do that if set by the author, it's generally limited to basic things only such as prompts, steps, resolution, batch size, and maybe seeds. But you can't really use things like ADetailer or img2img and other fancy stuff by yourself and you really depends on what is provided by the tool itself. In short: Creation Mode allows broader range of functions but with only basic abilities while AI Tool mostly allows specific functions, but can have better result because of the dark magic trickery inside its comfy flow.Thank you for reading this part of REYApping. See you in the next one (if there's any).
16
5
How to publis an AI Tool

How to publis an AI Tool

To publish a tool you need to have a workflow preparedYou can find them in ComfyFlow.From here you either make a new workflow, import a workflow file or choose already made one.When you selected a workflow to make into Ai tool, enter that workflows editor.Inside of selected workflow you need to have at least one AI Tool Node (TA Nodes) integrated in to the workflow.(More about TA Nodes: https://tensor.art/about/aitool-tutorial)Then you need to run the workflow.After you run it press "Publish" button in top right corner and select "Ai Tool"Now you need to fill out the boxes (Name, Channel)If you had done everything correctly you can also change "User-configurable Settings"Fill everything according to the Tool/Workflow and pres publish.
1
🎨 AI Tool: Turning Your Workflow into a Magical Black Box of Creativity! 🪄

🎨 AI Tool: Turning Your Workflow into a Magical Black Box of Creativity! 🪄

Hey there, fellow tinkerers and pixel wizards! 🌟 Ever wanted to create an AI tool so powerful, even your future self wouldn’t know how it works? Well, buckle up! Today, we’re diving into the quirky world of workflow wizardry—where you’ll craft AI tools using ComfyUI and publish them like a mysterious, shiny black box. The best part? Your users won’t see the chaos inside. 🤫So, What’s the Deal with AI Tools?Imagine you’re assembling a Lego masterpiece, except each piece is a node, and the result isn’t a castle—it’s an AI tool. 🏰 These tools take user inputs (like prompts or images), process them through a hidden workflow, and spit out something magical. Your users don’t need to know what’s under the hood—they’ll just press buttons and enjoy the ride!How to Build Your AI Tool (Without Losing Your Marbles):1️⃣ Dream It: Start by conceptualizing what your AI tool will do. Want to turn doodles into masterpieces or mix Christmas sweaters with robot aesthetics? The possibilities are endless. 🎅🤖2️⃣ Craft It: In ComfyUI, build your workflow by connecting nodes like a pro pipefitter. Each node has a purpose, from loading models to decoding images. This is where the magic happens—or chaos, depending on your coffee intake. ☕✨3️⃣ Test It: Run the workflow as an AI tool. At this stage, expect some hiccups. Maybe the colors look weird, or your robot Santa has three arms. That’s fine—it’s all part of the process!4️⃣ Polish It: Update, adjust, and repeat until your tool is sleeker than a freshly polished apple. 🍎 Then, publish it for the world to admire (or fear).The Secret Sauce: Export/Import User Settings 🍔When you update your workflow, the user-configurable settings can reset. 😱 But fear not! With the Export/Import feature, you can save and reload those settings faster than you can say "workflow meltdown."How It Works:Export: Before hitting the update button, export your settings. Think of it as taking a backup of your genius. 💾Import: After updating your workflow, reload the saved settings. Voilà—no more starting from scratch. 🪄Pro Tip: This feature doesn’t work if you change the nodes too drastically. So, proceed with caution or risk hearing your inner monologue scream. 😬Nodes and Workflows: A Quickie Guide for the Clueless 🤷‍♂️Nodes:Think of nodes as puzzle pieces. Each one handles a small task, like:Loading a model 🎒Decoding text 🧾Sampling images 🎨Connect them, and you’ve got a functional pipeline. Disconnected nodes, however, are just sad little islands of potential. 😢Workflows:A workflow is what you get when you chain nodes together. It’s like a recipe for your AI tool:Load a model.Process a prompt.Generate an image.Save it.Simple? Yes. Satisfying? Extremely.When to Publish Your AI Tool 🎉Once you’ve created your workflow and polished it to perfection, it’s time to publish! Your users will only see the polished front end, not the spaghetti-like chaos of nodes and connections you wrangled into submission.Encourage users to interact by configuring input fields like prompts or sliders. Their creativity meets your innovation—it’s a win-win!Tips for AI Tool Wizards-in-Training 🧙Start Small: Begin with simple workflows to avoid brain freeze. 🧊Tinker Away: Play with parameters to see how they affect the output.Be Bold: Experiment with styles and features. Combine multiple LoRAs for maximum chaos (and brilliance).ConclusionCongratulations, you’re now equipped to create AI tools that will wow, confuse, and delight users! 🎉 So, go forth and turn your wildest ideas into shiny black-box tools. And remember: with great power comes great responsibility—or at least some very weird outputs. 😜Happy creating! 🎨🪄BlackPantherP.S. Don’t forget to export those settings. Nobody likes redoing work twice!
2
AI Tools Guide - Update! ❄️

AI Tools Guide - Update! ❄️

Hello everyone!! Back again with me Shinoa here!!!😆Never mind, I'm just so excited for Christmas to come soon... 😅How are you guys doing over there? Has it snowed yet? It looks like fun to see people making snowmen, snowboarding, snowball fights, and more! 🏂🏻⛄️🎄Well back to the discussion that I will convey on this occasion, is the AI Tools Guide. 😊This time I will make a simple guide for one of my latest AI Tools, between [AI Tools] CHRISTMAS❄️ and [AI Tools] Text to Image.I will choose [AI Tools] CHRISTMAS❄️Before that, I will tell you about what you get if you use my AI Tools on this one. This AI Tools uses the Checkpoint Model that I like to use lately:NTR MIX | illustrious-XL | Noob-XL v4.0 [ Tensor.art ] [ Civit.ai ]I love the image results of this model which made me switch from Pony to Illustrious, but maybe I haven't been able to maximize this model.for Aspect Ratio I set it so that you can choose according to what you want, including:1:1 [1024x1024 square],2:3 [800x1200 portrait],3:2 [1200x800 landscape],9:16 [720x1280 portrait],16:9 [1280x720 landscape].And for the Sampling Method, I set it according to the recommendations of the Author, such as:Sampler : dpmpp_2m_sde_gpu,Scheduler : karras,Sampling Steps : 28,CFG Scale : 5.5,Generate : 4 Images... ... ...4 images... 4 Images bro... 4 Images!!! and also Sampling Steps 28 are settings that can only be used for PRO Members in create, you can get it here for FREE!!!😱whispered: “Sorry, here I am as a FREE Member who can't have the money to buy a PRO Member, with that I made this AI Tools so that I can experience the features that PRO Members have, so you can give me a buffet if you want...” 🤫Just kidding... Next!!!😂I only provide the Positive Prompt, Negative Prompt and Select Resolution sections that you fill in, so you don't need to do any more settings...In the Positive Prompt section there are prompts: “masterpiece, best quality, amazing quality, very aesthetic, absurdres, newest, scenery, (prompt), masterpiece, best quality, amazing quality, very aesthetic, absurdres, newest, scenery”In the (prompt) section you can replace with the prompt that you want to make according to your creation, you can input characters from anime or games that you like with prompts like, “ganyu \(genshin impact\)”, or it can be like “hatsune miku, rabbit hole \(vocaloid\)”, or also like “hoshino ai, oshi no ko”, or others that you can customize with your creation. Since this model is based on NoobAI you can also input an artist with a style that you like, you can get an Artist prompt that you can use here, if you can't then the solution is to use Lora. 🧐In this example, I will accompany Miku as a model in the AI Tools guide example, I will make Miku wear Christmas outfits. The prompts are:"masterpiece, best quality, amazing quality, very aesthetic, absurdres, newest, scenery, 1girl, solo, female focus, mature woman, hatsune miku, christmas, eyebrows visible through hair, long hair, twintails, ahoge, aqua hair, crossed bangs, hair between eyes, hair ornament, hat, red hat, aqua eyes, blush, closed mouth, smile, happy expression, breasts, medium breasts, bare shoulders, christmas outfit, collar, white collar, bow, red bow, dress, red dress, belt, white belt, skirt, short skirt, red skirt, thighhighs, red thighhighs, elbow gloves, red gloves, looking at viewer, standing, dynamic pose, hands up, holding gift, half body, cowboy shot, indoors, sofa, christmas tree, christmas gift, masterpiece, best quality, amazing quality, very aesthetic, absurdres, newest, scenery"After you input the Prompt, you need to choose the available resolution, here I choose 9:16 [720x1280 portrait] as the default of my AI Tools.After selecting the resolution you can click the “Go” button and wait for the results of the generation ... and my Miku images is finished, OMG she is very cute ... I love her so much ... 😍Yep... that's a simple guide to using my AI Tools, 😊Thank you to my friends Tensor.art discord you guys are amazing, 👊😎then for those of you who have read this article to completion, and to use my AI Tools, and also those who have supported me until now it has reached 100 followers. that's a lot that won't even fit in 2 classes,😂I love you all 🥰😘if there are questions / suggestions / criticisms you can leave in the comments column or in my article. that's all from me, take care of yourself there, take care of your health, see you again on another occasion ... Bye bye!!! 🎄🤗☃️
2
AI Tool -👌Easily create an Ai tool without prompt (Part 1)

AI Tool -👌Easily create an Ai tool without prompt (Part 1)

Often, we have a picture in our mind and can find a similar picture, but we don’t know how to write a prompt. Although tensor provides a reverse inference tool, there are other processes such as copying and pasting in the middle, and it does not support NSFW.In short, filling in the options is a very troublesome thing. I am not the only one who thinks so!Using the workflow to make a small tool can simplify a lot of processes. You can see the various small tools I made. Basically, there is no need to write prompt words, because I am a very lazy artistThe following is a simple tutorial to teach you how to make the first AI Tool. It is very simple. Just follow my picture step by step!Step 1: Create a new workflowStep 2: Select the img2img templateStep 3: Double-click the mouse on a blank area of ​​the interface, search for [wd] in the interface that appears, and select the [WD14 Tigger] plug-inStep 4: Drag the image on the load image panel and connect it to the image on the WD. This is the basis of the workflow [connecting nodes]!Step 5: Change the WD14 modle to V3 version, which is the latest image reverse model. With it, you can change your image to prompt.Step 6. Right-click on the Clip Text Encode panel and select Covert Text to Input.Step 7: Double-click the blank area again and enter string functionStep 8: Right-click on the string function panel and click [convert text_b to input]; then connect [string] on the WD14 panel to [text_b] of [stringfunction]Step 9: Connect the string in the stringfunction panel to the text in the CLIP Text encode panel, so your image will become a positive prompt!Step 10: Are you tired of reading? I am also tired of writing, let’s take a break😀😀😀😀😀😀😀😀Step 11: Click the load checkpoint panel ckpt_name, you can select the model, this time we choose a pony modelStep 12: In the string function and another clip text encode panel, fill in the pony's mass prompt[positive]:score_9,score_8_up,score_7_up, [negative]:score_3,score_2,score_1Step 13: It's almost done! Set the numbers in the ksample panel, refer to my values:Step 14: Click upload in the load image panel, select the image you like (the longest side should not exceed 1280), then click generate, and that's it!Step 15: Click Publish in the upper right corner, and then select Share Workflow. You will have your own workflow tool. You can find and run it on your personal homepage.This tutorial ends here. In the next issue, we will teach you how to convert WORKFLOW into a gadget and make it more useful and complete. Thank you for your support! This tutorial ends here. In the next issue, we will teach you how to convert WORKFLOW into a gadget and make it more useful and complete. Thank you for your support!
🎭 AI Tool Spotlight: Facial Expression Adjuster & GPTs Flux Prompt PRO 🚀

🎭 AI Tool Spotlight: Facial Expression Adjuster & GPTs Flux Prompt PRO 🚀

Unleashing Creative Potential with AI: A Spotlight on the Facial Expression Adjuster and GPTs Flux Prompt PROIn the ever-evolving world of artificial intelligence, precision and flexibility are at the heart of creating truly engaging and realistic digital content. From lifelike character animations to the fine-tuning of AI-generated imagery, a new generation of tools is enabling creators, animators, and designers to bring their visions to life with unprecedented control and detail. Two such cutting-edge tools—The Facial Expression Adjuster and GPTs Flux Prompt PRO—demonstrate the transformative power of intelligent automation in the creative workflow.1. The Facial Expression AdjusterLink: https://tensor.art/template/795874684511075193The Facial Expression Adjuster is a versatile AI solution designed to enhance and personalize digital facial expressions down to the tiniest detail. Whether you’re creating a 3D animated character or refining the emotional nuances of a still portrait, this tool lets you achieve unmatched accuracy and expressiveness. Key features include:Head Positioning: Easily control parameters such as pitch, yaw, and roll, ensuring perfect alignment and posture.Eye Expressions: Fine-tune blink and wink behaviors, adjust eyebrow angles, and position pupils for subtle or dramatic effects.Mouth Phonetics: Simulate mouth shapes corresponding to various phonemes (“A,” “E,” “W,” etc.) to produce speech-like expressions.Smile Calibration: Dial in the intensity of smiles, from a faint grin to a broad beam, adding depth and realism to character personalities.Ideal for animators, 3D artists, and AI developers, the Facial Expression Adjuster makes it simple to breathe life into digital avatars and scenes. By offering granular control over facial parameters, it unlocks new creative possibilities for storytelling and user engagement.2. GPTs Flux Prompt PROLink: https://chatgpt.com/g/g-NLx886UZW-flux-prompt-proAs AI-generated images increasingly reshape the creative landscape, the need for effective prompt engineering has never been greater. GPTs Flux Prompt PRO is a specialized tool that streamlines the process of crafting compelling, visually rich prompts for models like FLUX. By guiding creators through practical steps, offering real-world examples, and applying proven methods, it ensures that the prompts you design unlock the full potential of AI-generated visuals. Through this hands-on approach, even newcomers to prompt engineering can rapidly learn how to produce captivating outcomes that align with their artistic vision.Reinventing Your Workflow with AIBy incorporating The Facial Expression Adjuster and GPTs Flux Prompt PRO into your toolkit, you can drastically enhance the quality and impact of your creative output. These tools don’t just automate routine tasks; they empower you to direct AI-driven systems with precision and clarity, resulting in more refined, expressive, and emotionally compelling digital content.From breathing authenticity into virtual characters to perfecting your prompt-crafting skills, these advanced resources provide a blueprint for success in a world where technology and artistry continue to converge. If you’re ready to push your creative boundaries and discover new dimensions in AI-assisted art and animation, The Facial Expression Adjuster and GPTs Flux Prompt PRO stand ready to elevate your work to new heights.
3
AI Tool Video Generation Recommendation

AI Tool Video Generation Recommendation

Explore the evolving landscape of AI-powered video generation with our curated list of tools designed to bring your ideas to life. Each tool offers unique features tailored for diverse creative needs, from photorealistic renders to stylized motion. While their capabilities vary, these tools push the boundaries of AI creativity, though limitations like short durations and resolution constraints persist. Dive into this guide to discover the possibilities and challenges of SVD, CogVideoX, PyramidFlow, HunyuanVideo, and more—ideal companions for your video generation journey.1. Shutterbug | SVD & SD3.5L Turbo by PictureThttps://tensor.art/template/803606557651731715 its using SVD as base Limitations and BiasThe generated videos are rather short (<= 1.5sec), and the model does not achieve perfect photorealism.The model may generate videos without motion, or very slow camera pans.The model cannot be controlled through text.The model cannot render legible text.Faces and people in general may not be generated properly.The autoencoding part of the model is lossy.2. Let's generate a video using CogVideo-5B by oaahttps://tensor.art/template/783248442733541899sample:https://image.tensorartassets.com/workflow_template_showcase/783243275902494025/a3767754-af19-ab28-8ffe-80632559b43e.mp4Limitations :The generated videos are rather shortLimited parameters, only prompt, text2videoonly at low resolution3. Make your pictures come alive with CogVideo-5B by oaahttps://tensor.art/template/783254086320651706sample:https://image.tensorartassets.com/workflow_template_showcase/783255194436647499/63fbaa72-4493-3d5c-886b-19b6fd481b41.mp4Limitations :The generated videos are rather shortImg2Video with support only for landscape image with specific ratioonly at low resolution4. Let's generate a 384p video using PyramidFlow by oaahttps://tensor.art/template/783281513981656372sample:https://image.tensorartassets.com/workflow_template_showcase/790275614820104217/87be7526-ac5e-bca3-ac91-f80a1bfc58eb.mp4Limitations :The generated videos are rather shortLimited parameters, only prompt, text2videoOnly at 384p5. Make your pictures come alive with PyramidFLow by oaahttps://tensor.art/template/789854342952861190sample:https://image.tensorartassets.com/workflow_template_showcase/790272754371847397/2a99eba3-7917-a1b7-cf1b-d3468c90921f.mp4Limitations :The generated videos are rather shortImg2vid only works with certain aspect ratioOnly at 384p6. Make your pictures come alive with PyramidFlow - 768P Version by oaahttps://tensor.art/template/789871312368614821sample:https://image.tensorartassets.com/workflow_template_showcase/790275017819641763/f6523cfa-a883-9b05-3149-54b4ff999427.mp4Limitations :The generated videos are rather shortImg2vid only works with certain aspect ratioExpensive to run7. Mochi 1 preview - video generation by oaahttps://tensor.art/template/789464613325392462Mochi 1 preview is an open state-of-the-art video generation model with high-fidelity motion and strong prompt adherence in preliminary evaluation. This model dramatically closes the gap between closed and open video generation systems.sample:https://image.tensorartassets.com/workflow_template_showcase/789223103034147869/9916ffbd-e375-d017-a198-e7a1af1a7dc5.mp4Limitations :The generated videos are rather shortText2Vid only8. HunyuanVideo by oaahttps://tensor.art/template/803673151119656752sample:https://image.tensorartassets.com/workflow_template_showcase/803944541527945002/93638436-ae16-480b-3c6e-2b2e725eae0c.mp4Limitations :The generated videos are rather shortText2Vid only9. DimensionX - 3D Scene Generation by oaahttps://tensor.art/template/796266016161330278sample:https://image.tensorartassets.com/workflow_template_showcase/796264165045080771/da5e0cb9-60ec-8277-616d-a7093d9f5bb7.mp4Limitations :img2video that only works with certain ratio onlyonly rotate on left direction only
4
3
how to create ai tool for beginner - Christmas Walkthrough AI TOOL

how to create ai tool for beginner - Christmas Walkthrough AI TOOL

In this article i will share how easy to create AI Tool for beginner. check it out.1. click comfyFlow at create menu at the top2. click New Workflow or import workflow if you have any workflow3. Choose any template you want, in this section i will add text2img template4. The new tab browser will appear, wait until completed5. Setting the paramater you want, in this section i will change checkpoint and prompt only, then do running test6. after successfully testing, click publish it then choose AI Tool7. New tab will appear, then fill it, then click Publish8. TADA, your AI Tool now go public.
Using New TA Nodes with SelectParams to adjust Redux Style Model (new AI Tool)

Using New TA Nodes with SelectParams to adjust Redux Style Model (new AI Tool)

Guide to Using New TA Nodes with SelectParams on Tensor.artTensor.art recently introduced the powerful TA Nodes tool, enabling users to have more control and flexibility in AI-driven art creation. This article will guide you on how to use the SelectParams Node to adjust the application intensity of the Redux Style Model through the ConditioningAverage Node.1. What are TA Nodes?TA Nodes is a node-based workflow system that allows you to connect nodes to customize your image creation process. The SelectParams Node is a crucial feature, enabling you to fine-tune input parameters and control how much the Style Model influences the final output.2. Redux Style Model and the Role of SelectParamsThe Redux Style Model on Tensor.art is designed to produce artwork with a bold, minimalist yet sharp aesthetic. To manage the intensity of the Style Model's application and ensure the output aligns with your creative vision, the SelectParams Node allows you to adjust parameters dynamically via the ConditioningAverage Node.3. Steps to Use TA Nodes with SelectParamsStep 1: Create a Workflow with Redux Style ModelOpen the TA Nodes interface on Tensor.art.Add the Load Style Model node and select the model flux1-redux-dev.safe.tensors.Connect the Load Style Model node to the Apply Style Model node.Step 2: Add a PromptAdd the CLIP Text Encode (Prompt) node and input your creative idea.Example: "A cyberpunk cityscape at sunset with neon lights."Connect the output of CLIP Text Encode to the Apply Style Model node.Step 3: Add the SelectParams NodeAdd the SelectParams Node from the node list.Configure the settings:Creativity Levels: Choose between Low, Medium, or High.Set corresponding values for each level (e.g., Low: 0.1, Medium: 0.5, High: 0.8).Connect the SelectParams Node to the ConditioningAverage Node.Step 4: Integrate and AdjustConnect the ConditioningAverage Node to the output of the Apply Style Model node.In the ConditioningAverage Node, fine-tune additional parameters like Conditioning Strength to blend the values from SelectParams effectively.Step 5: Preview and FinalizeClick Preview AI Tool to inspect the output.If needed, go back and adjust the values in SelectParams.Once satisfied, click Go to generate the final artwork.4. Benefits of the SelectParams NodeFlexible Adjustments: The SelectParams Node allows you to increase or decrease the intensity of the Apply Style Model, ensuring the final image matches your creative intent.Seamless Integration with ConditioningAverage: It works directly with the ConditioningAverage Node, letting you control the Style Model's application intensity based on predefined levels (Low, Medium, High).Optimized Workflow: Quickly experiment with different settings without manually tweaking small parameters.High Precision: The ability to fine-tune specific levels ensures you achieve the desired result without excessive trial and error.Time-Saving: Predefined Low, Medium, and High settings make the adjustment process straightforward and efficient.5. Tips for Using the SelectParams NodeStart with Medium: This level is balanced and ideal for initial experimentation.Go High for Bold Results: Increase to High when aiming for detailed or striking artistic effects.Use Low for Subtlety: Lower the intensity when you want a natural and minimalist output.6. ConclusionThe SelectParams Node not only enables you to adjust the application intensity of the Redux Style Model but also optimizes your creative process. It's an ideal tool for ensuring that every piece of artwork reflects your vision and style. Start experimenting today on Tensor.art! 🎨
Understanding "Ai Tools" and How They Work on Tensor Art Platform

Understanding "Ai Tools" and How They Work on Tensor Art Platform

Understanding AI Tools and How They Work on Tensor Art PlatformIn recent years, Artificial Intelligence (AI) has revolutionized the way artists and creators produce visual content. One of the platforms making waves in this space is Tensor Art, a hub for AI-generated art enthusiasts and professionals. But how do AI tools work on such a platform, and what makes it special? Let’s break it down.What Are AI Tools?AI tools are software or programs powered by machine learning algorithms that analyze and learn from large datasets. In the context of art, these tools are trained on millions of images, patterns, and artistic techniques. This enables them to mimic styles, create unique visuals, and assist artists in enhancing or generating content with ease.How AI Works on Tensor ArtThe Tensor Art Platform integrates AI tools to provide users with a seamless creative experience. Here’s a simple overview of how it functions:Input Creation:Users provide an initial input, often in the form of text prompts, sketches, or existing images. For example, you might type, "A futuristic city at sunset with glowing skyscrapers."AI Processing:The platform’s AI engine processes the input using advanced algorithms. It deciphers the elements of your prompt, breaks down styles, and matches them with patterns in its database.Image Generation:Based on the input, the AI generates an image. On Tensor Art, users can choose between different artistic styles, such as impressionism, photorealism, or surrealism.Customization:Tensor Art allows users to refine the generated image by adjusting parameters like color tones, composition, or level of detail. This ensures that creators retain control over their work.Exporting and Sharing:Once satisfied, users can download their art or share it directly through the platform’s community. Tensor Art also supports high-resolution exports for professional use.Why Use Tensor Art?Tensor Art is designed with both amateurs and professionals in mind. Its user-friendly interface, combined with powerful AI capabilities, makes it ideal for:Experimenting with new art styles.Creating quick drafts or concepts.Generating high-quality visuals for personal or commercial projects.Final ThoughtsAI tools on platforms like Tensor Art are transforming how we approach creativity. By combining human imagination with machine precision, they open up endless possibilities for artists, designers, and hobbyists alike. Whether you’re looking to explore new ideas or speed up your workflow, Tensor Art is a powerful ally in the world of AI-generated art.
9
1
Christmas Walkthrough | AI Tool - small tips and tricks

Christmas Walkthrough | AI Tool - small tips and tricks

Hi guys, it's me Manuela here, This is my first Article so if there are mistakes on my post, feel free to correct it d^o^b3 small tips for beginners to create AI TOOL1/ You can rename any node if you feel it is not satisfactory or can cause confusion for new users2/ You can edit the prompt directly this way, instead of going back to the comfyui workflow environment3/ Instead of having to use the images created from the comfyui environment/workspace, you can upload your own unique cover image to make your AI tool look better. Hopefully this will help you somehow, Merry Xmas UwU
AI Tool & Radio Button. The beast is not as scary as it is portrayed.

AI Tool & Radio Button. The beast is not as scary as it is portrayed.

Let me start by saying that to create an "AI Tool" you first need to make a working "workflow". It is not for nothing that the first task of the second week, the "Christmas Walkthrough" event, is to create your own "workflow". To start creating it, just click here, as shown in the picture. For a better understanding of working with "workflow", create an empty "workflow", as shown in the picture. Now, you probably got scared. A strange black grid and an incomprehensible interface. Everything is fine, everything is quite simple here. Everything consists of nodes that are connected to each other, by connecting ones, similar to wires. You can watch the video of the "Tensor.art" team on "youtube", in which you will be introduced to the main nodes. The method of adding nodes in the video has a drawback. The list of nodes available for adding is very large and starts from the end of the list, and the most frequently used nodes are at the beginning of the list. Scrolling to the beginning of the list is very long and takes 2-3 minutes. Therefore, I advise using the search to add nodes. To open the search by nodes, you need to double-click the Left Mouse Button on an empty space. So which nodes exactly need to be added and what is their name? Let's try a method known from school. Let's copy someone's ready-made "workflow". For copying, I suggest my "workflow" - "Introvert Christmas & Phlegmatic New Year #Christmas Walkthrough". Everything as in the picture below you will try to copy.I made it according to the video guide of the "Tensor.art" team on "youtube", which I wrote about above. Adding a couple of other nodes from myself. Add all the necessary nodes using the search by nodes.Now fill in all the nodes, as in the "workflow" - "Introvert Christmas & Phlegmatic New Year #Christmas Walkthrough" or fill them with your custom parameters. Now exactly repeat the connections of the nodes as in the "workflow" - "Introvert Christmas & Phlegmatic New Year #Christmas Walkthrough" Hold down the left mouse button on the desired "light" then drag the wire to the other "light" as in the picture. To complete the task "AI Tool" containing "Radio Button". In addition to the two nodes "CLIP Text Encode (prompt)" I added one node "TA Node - PromptText". Then I turned one node with a positive prompt "CLIP Text Encode (prompt)" into "Input" as in the picture.As a result, I got this. I checked the functionality of the "workflow". With the "Run" button. After that I added the "Radio Button" as in the picture. The buttons are added, now you can press the publish button. Next, select the publication of the "AI Tool" and fill in all the sections. After pressing the publication again, the "AI Tool" is ready. It's not difficult, but at first it was scary? Congratulations!
8
4
AI Tool / The beast is not as scary. Guide to creation From A to Z, from yesterday's newbie.

AI Tool / The beast is not as scary. Guide to creation From A to Z, from yesterday's newbie.

Let me start by saying that to create an "AI Tool" you first need to make a working "workflow". It is not for nothing that the first task of the second week, the "Christmas Walkthrough" event, is to create your own "workflow".To start creating it, just click here, as shown in the picture.For a better understanding of working with "workflow", create an empty "workflow", as shown in the picture.Now, you probably got scared. A strange black grid and an incomprehensible interface. Everything is fine, everything is quite simple here. Everything consists of nodes that are connected to each other, by connecting ones, similar to wires. You can watch the video of the "tensor.art" team on "youtube", in which you will be introduced to the main nodes.The method of adding nodes in the video has a drawback. The list of nodes available for adding is very large and starts from the end of the list, and the most frequently used nodes are at the beginning of the list. Scrolling to the beginning of the list is very long and takes 2-3 minutes. Therefore, I advise using the search to add nodes. To open the search by nodes, you need to double-click the Left Mouse Button on an empty space.So which nodes exactly need to be added and what is their name? Let's try a method known from school. Let's copy someone's ready-made "workflow". For copying, I suggest my own "workflow" - "Introvert Christmas & Phlegmatic New Year #Christmas Walkthrough". Everything as in the picture below, you will try to copy.I made it according to the video guide of the "tensor.art" team on "youtube", which I wrote about above. Adding a couple of other nodes from myself. Add all the necessary nodes using the search by nodes.Now fill in all the nodes as in the "workflow" - "Introvert Christmas & Phlegmatic New Year #Christmas Walkthrough" or fill them with your custom parameters.Now exactly repeat the connections of the nodes as in the "workflow" - "Introvert Christmas & Phlegmatic New Year #Christmas Walkthrough". Hold down the left mouse button on the desired "light" then drag the wire to the other "light" as in the picture.To complete the task "AI Tool" containing "Radio Button". In addition to the two nodes "CLIP Text Encode (prompt)" I added one node "TA Node - PromptText". Then I turned one node with a positive prompt "CLIP Text Encode (prompt)" into "Input" as in the picture.As a result, I got this. I checked the functionality of the "workflow". With the "Run" button.After that I added the "Radio Button" as in the picture.The buttons are added, now you can click the publish button.Next, select the publication of the "AI Tool" and fill in all the sections. After clicking the publication again, everything "AI Tool" is ready. It's not difficult, really, but was it scary at first?Congratulations!
3
⚙️Beginner's guide to creating "AI tool": workflow basics and practice⚙️

⚙️Beginner's guide to creating "AI tool": workflow basics and practice⚙️

 IntroductionHello everyone. In this article, we will explain the basic mechanism for creating AI tools with "Tensor Art". We will introduce the particularly important meanings of "workflow" and "node", how to set them up, and procedures. What is an AI tool?AI Tools is a node-based tool for visually designing AI image generation. It consists of a processing flow (workflow) that combines nodes (like pieces of a puzzle) to generate an image.Main features of workflowIntuitive operability: simply place and connect nodes with drag and drop.Flexible configuration: Fully customize models (checkpoints), LoRA, prompts, and more.Real-time generation: You can start image generation immediately after setting.It is important to understand first! What is a node?A node is a "small unit responsible for one process" in image generation. For example, there are nodes such as "Load Checkpoint" that loads an AI model and "CLIP Text Encode" that analyzes prompts. Basic configuration of a node:Input: Materials that start processing (e.g. prompt or model).Output: Passes the results of processing to the next node.In an analogy, nodes are like the "parts" of a pipeline. Connecting these together creates the overall flow. What is a workflow?A workflow is a series of image generation flows designed by connecting multiple nodes.For example, create the following flow:Load an AI model (Load Checkpoint)Analyze the prompt (Prompt Encode)Generate an image (Sampler)Save the image (Save Node)Visually constructing these flows enables image generation in Tensor Art.Image Generation Workflow in Tensor Art: Basic Configuration and StepsBelow, we will explain the basic workflow and the role of each node in detail. Overview of the Basic Workflow The basic configuration for image generation in Tensor Art is as follows:Load Checkpoint (AI model): Select the base generative model.→ Node name: Load CheckpointEncode prompt (generation instruction): Specify the direction of image generation.→ Node name: CLIP Text EncodeApply LoRA model (optional): Add style and features.→ Node name: Load LoRAImage generation process: Generate image based on prompt and model.→ Node name: KSamplerVAE decode: Adjust generated image to make it human-readable.→ Node name: VAE DecodeSave image: Save generated image to file.→ Node name: Save ImageDetailed explanation and setting method for each node         🌸⬇️Let's use a workflow using FLUX as an example. ⬇️🌸1. Load CheckpointRole: Loads the model that is the basis of AI image generation.Settings: ckpt_name: Specify the model name you want to use.Example: FLUX-1-dev-fp8 (recommended checkpoint for TensorArt).2. Load LoRA (Add style)Role: Apply LoRA model that adds specific features and style.Settings: lora_name: Enter the name of the LoRA model you want to use.strength_model and strength_clip: Model influence (1.0 recommended).3. CLIP Text EncodeRole: Converts the content of the image to be generated (prompt) into a format that AI can understand.Settings:Example prompt: "futuristic cityscape, neon lights, digital painting".4. KSampler (Central process of image generation)Role: Generates the actual image based on the prompt and model.Settings:steps: Accuracy of generation (approximately 20-30).cfg: Applicability of the prompt (usually 1.0).sampler_name: Sampling method (e.g. Euler).5. VAE DecodeRole: Converts the generated latent image into the final image data.Note: Select a VAE that corresponds to the checkpoint.6. Save ImageRole: Saves the generated image as a file.Settings:filename_prefix: Specifies the beginning of the image name (e.g. "TensorArt_").Example of actual workflow: Node connectionBelow is an example of an actual node connection. Image generation is possible by reproducing this flow in the Tensor Art node editor.Load Checkpoint → Load the AI ​​model.Add Load LoRA if necessary and apply styles.Enter prompts into CLIP Text Encode and set the generation content.Use FluxGuidance (adjust guidance scale) to fine-tune the influence of the prompt.Generate an image with KSampler.Adjust the image through VAE Decode.Finally, save the image with Save Image. Frequently Asked QuestionsQ1. What is the difference between Checkpoint and LoRA?Checkpoint: A model that is the basis of AI image generation. It determines the overall style.LoRA: A module for adding specific additional styles and fine features.Q2. Is VAE required?Basically used in conjunction with Checkpoint. Without VAE, the color and resolution of the image may not be displayed properly. SummaryOnce you understand how nodes and workflows work, you can create your own images just the way you want them. Use this guide to get started with a simple setup! 😆👍           ⬆️This is an image generated using the workflow introduced this time 😊 Next stepsTry your own prompts and settings.Combine multiple LoRAs to pursue originality.Experiment with high resolution and special styles.By publishing the completed workflow, you can have many people use it as your AI tool 👍Enjoy your creative adventure with Tensor Art! Side note: Tips for beginnersUnderstand the basics of nodes: First, understand what each node does.Start with a simple workflow: Try a workflow with a minimum number of nodes to help you understand how it works.Repeat the experiment: Adjust the parameters of each node and see how the generated image changes.
8
6
🔰 “AI Tool” Export/import user settings

🔰 “AI Tool” Export/import user settings

Hello 🙂 Today, I will explain the "export" and "import" settings when publishing an AI tool,which has been introduced several times on the site.To publish an AI tool, roughly speaking,1) Create a workflow based on the concept of the AI ​​tool you want to make2) Configure, adjust, and test the workflow3) Test as an AI tool, and publishI think you will create and publish in the above order, butAfter you are satisfied with part 2), when you turn it into a tool and test it in part 3), you may see a "defect" or "finishing discrepancy" that you could not see in workflow mode.In this case, you should configure and adjust the "workflow that is the basis of the tool" again, then "update the workflow" on the "edit" mode screen of the AI ​​tool, reflecting the changes in the AI ​​tool settings, and then publish it again. This is the flow.When you perform this "workflow update", the information displayed on the AI tool operation screen will change.“User-configurable Settings” will be “reset”! What you have gone through a lot of trouble configuring, sorting, etc., is now starting from scratch.I can't help but sigh at having to start over 😮 Corresponding to this resetThe method is " Export/Import settings ''.With this function, even if you need to repeatedly update your workflow, you can easily return to the "User-configurable Settings" settings you used when you first created the tool, so you can avoid unnecessary work.Here's how to do it:● Export (save settings before workflow update)1) Open the "Edit" mode screen of the AI ​​tool and scroll down to find "User-configurable Settings". To the right of it there are three buttons: "Import", "Export", and "Empty". Click "Export".2) Then, if you are using a PC, a dialog box will appear asking you to confirm the “file save destination”.Save it in an easy-to-find location so you don't get lost later.At this time, it is even more convenient to give the file a "file name" that is easy to identify.(This procedure applies to smartphones, tablets, etc.)This is the end of "Export".◆ Import (Load previous settings after updating workflow)1) Go to "User-configurable Settings"in the same way as when exporting and click "Import".2) A dialog box will appear asking you which file to import,so specify the file you "saved" (exported) earlier and click "OK".(For smartphones, tablets, etc., follow these guidelines)This will restore the "settings" that were reset by "update workflow".You should see that it is.The above is how to "Export" and "Import" "User - configurable Settings", but there is one thing to keep in mind.That is, if you "change the node type" or "add a new node or delete a node" when updating the workflow,"Export" and "Import" will not work. Please note that these are functions to save and restore the "initial settings made into a tool".I think there are many similar articles on the site, but this time's "Christmas Walkthrough"I hope this will be helpful for those who are trying to create an AI tool for the first time at the event 🙂
13
5
Christmas Walkthrough | Add Radio Buttons to an old Ai Tool.

Christmas Walkthrough | Add Radio Buttons to an old Ai Tool.

What are Radio Buttons?They allow you to use name syntax in your prompt to get a lines of prompt from a file. in TensorArt we will use it as susbtitition for personalized wildcards. So Radio Buttons are pseudo-wildcards. Check this article to know how to manipulate and personalize them. Radio Buttons requires a <Clip Text Encoder> node to be storo within.What do we need?Any working Ai ToolIn my current exploration only certain <CLIP Text Encoder> nodes allows you to use them as Radio Button containers. For this example I'll use my ai tool: 📸 Shutterbug | SD3.5L Turbo.Duplicate/Download your Ai Tool workflow (To have a Backup).Add a <CLIP Text Encode> node.Add a <Conditioning Combine> node,Ensamble the nodes as the illustration shows; be careful with the combine method, use concat if you're not experienced at combining clips, this will instruct your prompting to ADD the Radio Button calling prompt.💾 Save your Ai Tool workflow.Go to Edit mode in your Ai Tool.Export your current User-configurable Settings (JSON).↺ Update your Ai Tool.Import your old User-configurable Settings (JSON).Look for the new <CLIP TextEncode> node, and load it.Hover over the <CLIP TextEncode> new tab, and select Edit.Config your Radio Buttons.Publish your Ai Tool.Done! Enjoy the Radio Button feature in your Ai Tools, so in my case my new Ai Tool looks like this:📹 Shutterbug | SVD & SD3.5L Turbo.Note: I also included SVD video to meet the requirements of the Christmas Walkthrough event.
4

TensorArt New Feature Tutorial: Classic Workbench Text-to-Video and Image-to-Video

Hello everyone! TensorArt has recently launched a new feature in the Classic Workbench, supporting Text-to-Video and Image-to-Video functionalities. Today, I’ll walk you through how to use these exciting new features to create your own video content! ��Step 1: Open the Classic WorkbenchFirst, open the TensorArt Classic Workbench and go to the main interface. Then, locate the Text to Video module. Step 2: Select Model and SettingsIn the Text to Video page, you'll see two important options: Models and Settings. Currently, there are three models available for you to choose from.·FPS (Frames Per Second): FPS stands for Frames Per Second, which indicates how many frames of images are displayed per second. The higher the FPS, the smoother the video looks. For example, we can set the FPS to 24, which is typically suitable for most video productions.Duration: Duration refers to how long your video will play, from start to finish. You can set it in seconds, minutes, or longer, depending on your needs.Once you've adjusted these settings, input your Prompts (the text description of what you want to generate), and click Generate. Voila! Your video will be created based on the prompts you provided! ✨Step 3: Image-to-VideoNext, let's take a look at the Image to Video feature. Here, you’ll see two models available. First, click to upload the image you want to use. Then, set the related parameters, such as FPS and Duration. Finally, input your Prompts (describing how you want the image to be turned into a video) and click Generate.It’s that simple! By adjusting the settings, you can create creative image-to-video works.SummaryHow easy is that? �� With just a few simple steps, you can turn text into lively video or transform static images into dynamic video content. Why not give it a try?If you have any questions or want to share your creations, feel free to leave a comment below! ��We look forward to seeing your creative works! Come try out the Text-to-Video and Image-to-Video features on TensorArt today! 
34
3
【12/9更新あり】 日本語訳 11月29日~12月26日 公式イベント ChristmasWalkthrough

【12/9更新あり】 日本語訳 11月29日~12月26日 公式イベント ChristmasWalkthrough

11/29~12/26までのクリスマスイベントの日本語訳です。<時間がない人・何していいかわからない人>12月13日の朝8:59までにホームにピン留めされた「3DVideo」「RealAnime」で動画と画像投稿で2day Pro GET!の激熱イベントなので、ぜひこれだけはやっておきましょう。元記事https://tensor.art/blackboard/ChristmasWalkthroughhttps://docs.google.com/document/d/10GsQgVS-myqSHJGDLVQT3Su9o7gjxvCFl3CehL8ICwk/edit?tab=t.0こんにちは、旅人さん!🎅🎄ようこそ、Tensor Impactへ!これから君はクリスマスの冒険の旅に出るのだよ。探索タスクを次々と達成して、素晴らしい報酬を手に入れてくれたまえ!✨⏰ 探索期間:11月29日 UTC → 11月29日 09:00 JSTから12月26日 UTC → 12月26日 09:00 JSTまで。この28日間で**「クリスマスウォークスルー」の全タスクを達成し、成功した探検家になろう!🎁達成者には49.9ドルの現金報酬**と、**新年プロモーション(1つ購入で1つ無料!)**が待っている!さらに、タスクごとに20ドル相当の報酬やPro会員特典、クレジットを獲得できるぞ。📅 探索タスクカレンダー毎日1つずつタスクが用意されており、各週内にタスクをすべてクリアすればウィークリーバッジをゲット!もしタスクを1つでも達成できなかった場合は「マジックバッジ」を使って補完できるので安心じゃ!各タスクには難易度が表示されているよ(例: 🌟 = 簡単, 🌟🌟🌟 = 難しい)。難しいタスクにはガイドも用意されているから活用してくれたまえ!すべての投稿には必ず「#Christmas Walkthrough」のタグを付けるのをお忘れなく!🎨ウィーク1: 11月29日~12月5日期間中にすべてのタスクを完了すると、200クレジット(ボーナス込み)がもらえる!日付タスク報酬11/29 毎日のテーマに投稿20クレジット11/30 テーマカレンダーに沿った投稿20クレジット12/1 テーマカレンダーに沿った投稿20クレジット12/2 テーマカレンダーに沿った投稿20クレジット12/3 テーマカレンダーに沿った投稿20クレジット12/4 テーマカレンダーに沿った投稿20クレジット12/5 テーマカレンダーに沿った投稿20クレジットウィーク2: 12月6日~12月12日(情報更新されているので注意!!)期間中にすべてのタスクを完了すると、10日分のPro会員特典がもらえる!12/6 ワークフローの公開 → 1日分のPro会員特典12/7 動画生成AIツールを公開 → 1日分のPro会員特典12/8 ホームにピン留めされた「3DVideo」AIツールで動画を投稿 → 1日分のPro会員特典12/9 ホームにピン留めされた「RealAnime」AIツールで投稿 → 1日分のPro会員特典12/10 AIツール関連の記事を公開 → 1日分のPro会員特典12/11 ラジオボタンを含むAIツールを公開 → 1日分のPro会員特典12/12 サブスクリプションを開設(12/13以前なら達成) → 1日分のPro会員特典日付日本語訳原文12.6タスク: ワークフローを公開する Task: Publish a workflow12.7タスク: 動画投稿を公開する Task: Publish a video post12.8タスク: 動画生成AIツールを公開する Task: Publish an AI Tool that generate video12.9タスク: ホームページに固定されている「RealAnime」AIツールを使って投稿を公開する Task: Use the "RealAnime" AI Tool pinned on the homepage to publish a post12.10タスク: AIツールに関連する記事を公開し、タイトルに「AI Tool」を含める Task: Publish an article related to AI Tools, include text “AI Tool” in title12.11タスク: 「ラジオボタン」を含むAIツールを公開する Task: Publish an AI Tool containing "Radio Button"12.12タスク: サブスクリプションを作成する(12.13以前に作成すれば完了と見なされる) Task: Create a buffet plan. (considered as completed as long as created before 12.13)ウィーク3: 12月13日~12月19日期間中にすべてのタスクを完了すると、20ドルの現金報酬を獲得!12/13 クリスマスをテーマにしたモデルを公開 → $212/14 モデル関連の記事を公開 → $212/15 「ゲームデザイン」「ビジュアルデザイン」「スペースデザイン」のチャンネルに合うモデルを公開 → $212/16 TenStarFundに参加したモデルを公開 → $212/17 11月29日以降にアップロードされ、20件以上の投稿があるモデルを持つ → $212/18 ベースモデルをIllustriousとしてオンライントレーニングを使ったモデルを公開 → $212/19 サブスクリプション活動(購入または購入される)を行う → $2| 日付 | 難易度 | 日本語訳 | 英語訳 | 報酬 ||--------|--------|----------------------------------------------------------------------------------------------|-----------------------------------------------------------------------------------------------|------------------|| 12/13 | ★★ | クリスマスをテーマにしたモデルを公開する。 | Publish a Christmas-themed Model. | $2 キャッシュ || 12/14 | ★★ | 「Model Training」という文字をタイトルに含めた、モデルに関する記事を公開する。 | Publish an article related to Model, include text "Model Training" in title. | $2 キャッシュ || 12/15 | ★★ | 「ゲームデザイン」「ビジュアルデザイン」「宇宙デザイン」チャンネルのいずれかに、 | Publish a Model in one of the "Game Design, Visual Design, Space Design" channels, | $2 キャッシュ || | | そのチャンネルのスタイルに合わせたモデルを公開する。 | matching the style of the chosen channel. | || 12/16 | ★★★ | TenStarFund に成功裏に参加したモデルを公開する。 | Publish a Model that successfully joined the TenStarFund. | $2 キャッシュ || 12/17 | ★★ | 11月29日以降にアップロードされ、20以上のユーザーポストがあるモデルを用意する。 | Have a Model uploaded after November 29th with over 20 user posts. | $2 キャッシュ || 12/18 | ★★★ | 基本モデルとして「Illustrious」を使用し、オンライントレーニングでモデルを公開する。 | Publish a Model using Online Training with the base model being Illustrious. | $2 キャッシュ || 12/19 | ★★★ | 11月28日 0:00 UTC以降の購入記録があること。 | Have Purchase Record since 11.28 00:00 UTC. | 20 クレジット |### ボーナス| 内容 | 英語訳 | 報酬 ||----------------------------------------------------------------------------------------------------------------|-----------------------------------------------------------------------------------------------|------------------|| すべての探索タスクを3週目に完了すると合計 $20 ($2×7 + 追加 $6) が獲得可能。 | Complete all exploration tasks in the third week to earn a total of $20 cash ($2×7 + extra $6). | - |ウィーク4: 12月20日~12月26日この週には特別な名誉バッジがもらえるタスクもあるぞ!12/20 イベント期間中に公開された投稿が「リミックス」される12/21 TensorArtに関連する内容をSNSでシェアし、アンケートに回答12/22 #Christmas Walkthroughのタグが付いた投稿に「いいね」「コメント」「スター」のいずれかをする12/23 30クレジットでバッジを交換(マイページ→クレジット)12/24 イベント中に公開されたAIツールが「ブラックホースAIツール」ランキングトップ100に入る12/25 イベント中に公開されたモデルが「ブラックホースモデル」ランキングトップ100に入る12/26 「クリエイター」ランキングトップ100に入るさあ、冒険の旅を楽しんでくれたまえ!サンタも応援しているぞ!🎁✨
49
2
Christmas Walkthrough 【日本語訳】11/29~12/26

Christmas Walkthrough 【日本語訳】11/29~12/26

クリスマスイベントの日本語訳です。(12/7修正)こんにちは、旅行者さん! Tensor Impact へようこそ。これから一連の探索タスクに着手し、さまざまな豪華報酬を獲得してください。⏰ 探索期間:  11 月 29 日から 12 月 26 日 (協定世界時)28 日以内にクリスマス ウォークスルーのすべてのタスクを完了して、成功した探検家になりましょう!勝つ $49.9 現金と 1 つ買うともう 1 つ無料の新年プロモーション!各探索タスクを完了すると、対応する報酬 ($20、プロ、クレジット) も獲得できます。 📅 探索タスクカレンダー毎日 1 つのタスクがあり、その週以内にタスクを完了するとウィークリー バッジを獲得できます。タスクの 1 つを完了できなかった場合でも、心配する必要はありません。バッジ引き換えセクションを確認し、未完了のタスクを自動的に完了としてマークする Magic バッジを引き換えてください。詳細については、 の数 🌟タスクの後には、このタスクを達成するのがどれほど難しいかを意味します。私たちは提供します 「探索タスクガイド」 3 つ星以上のタスクに関するガイダンスを参照してください。 参加しているすべてのモデル、AI ツール、投稿には、 タグ「#Christmas Walkthrough」 公開されたとき。記事とワークフローに「ChristmasWalkthrough」タグを含める必要はありません。# お知らせ: すべてのタスクは必ずしもその日に完了する必要はありません。事前に、またはその週の終わりまでに行うことができます。ただし、週末までに完了しない場合、タスクは欠落したものとみなされます。私たちのブラックホースリーダーボード: [TensorArt] Christmas Walkthrough: Dark Horse Leaderboard12.21 タスクについては、ソーシャル メディアに投稿した後、このアンケートに回答してください。 Googleフォーム毎日のテーマ🔱バッジの紹介– バッジの構成毎日のバッジ: 合計 26 個、毎日の探索タスクを完了すると授与されます (1 月 10 日まで有効)。ウィークリーバッジ: 合計 4 個、各週のすべてのタスクを完了すると授与されます (1 月 10 日まで有効)。究極のバッジ: 合計 1 つ、すべての探索タスクを完了すると授与されます (90 日間有効)。12.23 タスクバッジ: 合計 1 つで、12 月 23 日のタスクと引き換えるにはクレジットが必要です (1 月 10 日まで有効)。マジックバッジ: 合計 4 つ、未完了のタスクを自動的に完了としてマークするために引き換えることができますが、報酬は与えられません (1 月 10 日まで有効)。名誉バッジ: 合計 1 つ。12 月 26 日のタスクを完了すると自動的に授与されます。引き換え可能ですが、報酬は与えられません (1 月 10 日まで有効)。 – 発行ルールすべてのイベント時間は UTC で計算されます。タスクは UTC 時間内に完了するようにしてください。毎週金曜日に、前週に完了したタスクに対してバッジを発行します。毎週のタスク (金曜日から次の木曜日まで) は、完了したとみなされるために、同じ週内に完了する必要があります。 たとえば、12 月 6 日のタスクは 12 月 1 日から 12 月 7 日までに完了する必要があります。毎週のタスクをすべて完了すると、週ごとのバッジのみが獲得でき、毎日のバッジは獲得できません。タスク、マジック、名誉のバッジは引き換え時に自動的に付与されます。タスクバッジは交換でのみ入手できます。魔法のバッジでは代用できません。名誉バッジは交換を通じてのみ入手できます。魔法のバッジでは代用できません。– 引き換えルールバッジ引き換え期間は11月29日から12月26日まで。12 月 26 日のタスクでは、完了済みとしてマークされる「名誉バッジ」を引き換えるのに 10,000 クレジットが必要です。マジック バッジは 5 つあり、そのうち 4 つを引き換えるには「5、50、500、1000」クレジットが必要ですが、完了報酬は付与されません。マジック バッジでは、12 月 23 日と 12 月 26 日のバッジを引き換えることはできません。一度引換したバッジは返品できません。📜イベントルールシステムのデフォルトのアバターとニックネームを持つユーザーは報酬を受け取りません。現金報酬はイベント終了時に GPU 基金に入金され、いつでも引き出す​​ことができます。イベントモデルはオリジナルである必要があり、再印刷またはマージはカウントされません。イベントの内容はコミュニティのルールに準拠する必要があります。 NSFW、児童ポルノ、有名人の画像、暴力、低品質のコンテンツは対象外です。不正行為は失格となります。 Tensor.Art はイベントの最終解釈権を留保します。ご不明な点がございましたら、Discord でチケットを開いてスタッフにお問い合わせください。タグ「#Christmas Walkthrough」を使おう忘れやすそうなので大きくしましたタグ「#Christmas Walkthrough」を使いましょう。#はタグを示すマークです。タグ欄に「Christmas Walkthrough」と入力するといいです。(記事とワークフローに「ChristmasWalkthrough」タグを含める必要はありません。)日本人向け注意事項おそらくタスクはUTC時間に合わせてする必要があります。朝9時がUTCの0時です。ユーザー名と画像の設定をしましょう。日本人の認識より児童系は判定がきついことが多いです。子供やちびキャラの画像は避けましょう。運営からの回答「クリスマス ウォルトロウ」の 2 週目に作成された同じ AI ツールは、その週のすべてのタスクにカウントできますか? (すべての要件を満たしている場合)それとも、別のツールを作成する必要がありますか? もう 1 つは、新しい AI ツールを公開するのではなく、新しい要件を満たすために古い AI ツールを更新した場合、カウントされますか?A:2 週目に作成された AI ツールはカウントできます。11.29以降に作成されたすべての AI ツールがカウントされます。ただし、古い AI ツールを更新するだけでは要件を満たさないため、新しい AI ツールにする必要があります。マジックバッジについてA:マジックバッジは、一種の補償メカニズムです。特定の日にタスクを逃したり、完了できなかったりした場合は、マジックバッジを購入して逃したバッジを引き換えることができます。これにより、最終的な報酬を獲得しやすくなります。たとえば、12 月 17 日のタスクは「11 月 29 日以降に 20 を超えるユーザー投稿を含むモデルをアップロードする」であり、このタスクを達成できませんでしたが、最終的な報酬である 49.9 ドルにはバッジが 1 つ足りません。マジックバッジを引き換えると、自動的に不足分が補われ、最終的な大賞を獲得できるようになります。投稿し忘れちゃった当日に日替わりテーマカレンダーを投稿し忘れたとしても、心配しないでください。今週中に7 つの日替わりテーマの投稿を公開すれば、バッジと報酬を獲得できます。数日前に見逃してしまった場合は、ぜひ追いついてください。探索タスクガイドこのガイドでは、次の詳細な手順を説明します。 3 つ星以上の高難易度探索タスク。12.7 探索タスク: 動画を生成するAIツールを公開します。完了方法:次のビデオ ノードのいずれかを使用することをお勧めします: Cogvideo、Mochi、Pyramid-Flow。ビデオ ワークフロー (テキストからビデオ、または画像からビデオ) を作成し、AI ツールとして公開します。12.8 探索タスク: ホームページに固定されている「3DVideo」AI ツールを使用して、ビデオ投稿を公開します。完了方法:指定された AI ツールを使用します: 👉 3Dビデオ 👈 画像を生成して投稿します。12.9 探索タスク: ホームページに固定されている「RealAnime」AI ツールを使用して投稿を公開します。完了方法:指定された AI ツールを使用します: 👉 リアルアニメ 👈 画像を生成して投稿します。12.11探索タスク: 「ラジオボタン」を含むAIツールを公開します。完了方法:AI ツールを公開するときは、ユーザーが設定するプロンプト ノード (テキストなど) を開きます。「入力タイプ」で「ラジオボタン」を選択します。12.16探索タスク: TenStarFund に正常に参加したモデルを公開します。完了方法:💸 TenStar Fund プロジェクトを通じてモデルを実行して収入を稼ぎます。詳しい操作方法や導入方法については、以下をご確認ください。 [リンク]12.18探索タスク: Illustrious のベース モデルを使用して、オンライン トレーニングを使用してモデルを公開します。完了方法:基本モデル Illustrious を使用したオンライン トレーニングについては、提供される特定の指示に従ってください。12.26探索タスク: 「クリエイター」リーダーボードのトップ 100 にランクインします。完了方法:リンクをクリックしてリーダーボードを表示します。 [リンク]
31
4
RealAnime Event: Toon Drifter Faction Showdown! ~11/28 日本語訳

RealAnime Event: Toon Drifter Faction Showdown! ~11/28 日本語訳

アニメキャラクターが第四の壁を突破できるTensorArt専用モデル「RealAnime」が登場! 🎉使いやすい AI ツールを使用して、現実世界のシーンでアニメ キャラクターを生成できます。プロンプトを入力するだけで、魔法が起こるのを観察できます。ショー・ドリフター目覚ましが鳴ったら、起きて仕事に行く時間です!アニメのキャラクターもお腹を満たすために頑張らなければなりません。指定されたものを利用する AIツール お気に入りのアニメキャラクターの職場生活をデザインしてみませんか? 💼✨ブルース・ウェインとは異なり、ジョーカーは仕事の後、食料品を買い、自分で食事を作らなければなりません。 🤡レムはメイドカフェでコーヒーとデザートの作り方を学ぶ必要があります。給料が低かったため、サノスは指を鳴らして会社を爆破することを決意しました。 💥派閥対決に参加しよう!派閥を選択し、指定されたタグを付けて投稿することで派閥の評判を高めましょう!派閥タグ(たぶん必須 どれか一つを使う)#Driftermon#DrifterAvengers#DrifterDoom評判の計算ルール:評判 = (投稿した Pro ユーザーの数 0.4 + 投稿した Standard ユーザーの数 0.2 + いいねをした人の数 0.1 + リミックスした人の数 0.3) * 100各勢力の評判は毎日更新されるので、毎日投稿してチームへのサポートを結集することを忘れないでください。 🏆*公式のイベントページにチーム評価を表示するタグがあります。最高の評判ボーナス:トップ派閥のメンバー全員に 500 クレジットと 1 日 Pro が与えられます。 🎉特別ボーナス:質の高い投稿には不思議な報酬が当たるチャンスも! 🎁ソーシャルメディア投稿報酬ソーシャル メディアへの投稿ごとに 100 クレジット、最大 500 クレジットを獲得できます。コンテンツ形式:無制限!タグを含める必要があります: #TensorArt そして #RealAnimeサポートされているプラ​​ットフォーム: Instagram、TikTok、Twitter、Facebook、Reddit、YouTube、Pinterest。追加の報酬:500 件以上の「いいね!」: $20500 リツイート以上: 70 ドルフォロワーが 5,000 人を超える場合、500 件以上の「いいね!」で 40 ドル、500 件以上のリツイートで 140 ドルを獲得できます。クリック 記入するアイコン 参加情報を確認して報酬を受け取りましょう! 📲イベント期間11月18日~11月28日イベントルール投稿のテーマと内容はイベントのスタイルと一致している必要があります。各投稿にはイベント タグを 1 つだけ含めることができます。デフォルトのアバターとニックネームを持つユーザーは特典を受け取る資格がありません。NSFW、児童セレブのポルノ、低品質のコンテンツは有効な参加としてカウントされません。不正行為があった場合はイベントから失格となります。イベントの最終的な解釈権は Tensor.Art に帰属します。正しい生成方法(公式)たった4ステップでアツい「第四の壁突破」画像が完成!クリック AIツール 始めましょう! 🖱️✨ステップ1ページの右側で、キャラクター名のオプションを選択するか、「カスタム」をクリックしてアニメキャラクターの名前を入力します。ステップ2以下の「何かを行う」セクションで、対応するアクションのオプションを選択するか、「カスタム」をクリックしてアクションを説明します。詳細な説明により、「赤いドレスを着て本物のオープンカーでワインを飲む」など、より正確な生成結果が得られます。ステップ3「画像サイズ」を選択します。ニーズに基づいて選択できる 9 つの一般的なサイズがあります。ステップ4下の「go」ボタンをクリックして、画像が生成されるまで辛抱強く待ちます。上のタブを切り替えると過去の結果が表示されます。ヒント「翻訳」をクリックすると、入力テキストを英語に翻訳できます。生成結果に満足できない場合は、キャラクターやシーンを変更して再試行してください。 🎨✨ハムスター式生成方法12つに分かれてたらいいだろうというノリで、好きに書く。ハムスター式生成方法2もう②にはスペース「 」しか入れない。ヒント・普通にプロンプト書いた方が手っ取り早い
57
9
Halloween2024 | Unlocking Creativity: The Power of Prompt Words in Writing

Halloween2024 | Unlocking Creativity: The Power of Prompt Words in Writing

Unlocking Creativity: The Power of Prompt Words in WritingWriting can sometimes feel tough, especially when you’re staring at a blank page. If you’re struggling to find inspiration, prompt words can be a helpful tool. These words can spark ideas and make writing easier and more fun. Let’s explore how prompt words can boost your creativity and how to use them effectively.What Are Prompt Words?Prompt words are specific words or phrases that inspire you to write. They can be anything from a single word to a short phrase that gets your imagination going. For example, words like "adventure," "friendship," or "mystery" can lead to exciting stories or poems.Why Use Prompt Words?1. Overcome Writer’s Block: If you’re stuck and don’t know what to write, a prompt word can give you a direction to start.2. Spark Creativity: One word can trigger a flood of ideas. It helps you think outside the box.3. Try New Styles: Prompt words encourage you to write in different genres or styles you might not normally explore.4. Build a Writing Habit: Using prompt words regularly can help you develop a consistent writing routine.How to Use Prompt Words1. Make a ListStart by writing down some prompt words that inspire you. Here are a few examples:- Adventure- Dream- Secret- Journey- Change2. Quick Writing ExercisePick a prompt word and set a timer for 10 minutes. Write anything that comes to mind without worrying about making it perfect. This helps you get your ideas flowing.3. Write a Story or SceneChoose a prompt word and try to write a short story or scene based on it. For example, if your word is "mystery," think about a detective solving a case.4. Create a PoemUse a prompt word to write a poem. Let the word guide your ideas and feelings. You can write a simple haiku or free verse.5. Share with FriendsShare your prompt words with friends and challenge each other to write something based on the same word. This can lead to fun discussions and new ideas.Tips for Using Prompt Words- Write Daily: Spend a few minutes each day writing with a prompt word. This builds your skills and keeps your creativity flowing.- Make a Prompt Jar: Write different prompt words on slips of paper and put them in a jar. Whenever you need inspiration, pull one out and start writing.- Reflect on Your Work: After you write, take a moment to think about what you created. What did you like? What can you improve?- Explore Different Genres: Use prompt words to try writing in genres you don’t usually write in, like fantasy or poetry. This helps you grow as a writer. ConclusionPrompt words are a simple yet powerful way to boost your creativity and make writing enjoyable. They can help you overcome blocks, spark new ideas, and develop a consistent writing habit. So, the next time you feel stuck, remember that a single word can lead to amazing stories. Embrace the power of prompt words and watch your creativity soar!
58
6
ComfyUI Core Nodes Loaders #CHRISTMAS WALKTHROUGH

ComfyUI Core Nodes Loaders #CHRISTMAS WALKTHROUGH

1. Load CLIP VisonDecode the image to form descriptions (prompts), and then convert them into conditional inputs for the sampler. Based on the decoded descriptions (prompts), generate new similar images. Multiple nodes can be used together. Suitable for transforming concepts, abstract things, used in combination with Clip Vision Encode.2. Load CLIPThe Load CLIP node can be used to load a specific CLIP model, CLIP models are used to encode text prompts that guide the diffusion process.*Conditional diffusion models are trained using a specific CLIP model, using a different model than the one which it was trained with is unlikely to result in good images. The Load Checkpoint node automatically loads the correct CLIP model.3. unCLIP Checkpoint LoaderThe unCLIP Checkpoint Loader node can be used to load a diffusion model specifically made to work with unCLIP. unCLIP Diffusion models are used to denoise latents conditioned not only on the provided text prompt, but also on provided images. This node will also provide the appropriate VAE and CLIP and CLIP vision models.*even though this node can be used to load all diffusion models, not all diffusion models are compatible with unCLIP.4. load controlnet modelThe Load ControlNet Model node can be used to load a ControlNet model, Used in conjunction with Apply ControlNet.5. Load LoRA6. Load VAE7. Load Upscale Model8. Load Checkpoint9. Load Style ModelThe Load Style Model node can be used to load a Style model. Style models can be used to provide a diffusion model a visual hint as to what kind of style the denoised latent should be in.* Only T2IAdaptor style models are currently supported.10. Hypernetwork LoaderThe Hypernetwork Loader node can be used to load a hypernetwork. Similar to LoRAs, they are used to modify the diffusion model, to alter the way in which latents are denoised. Typical use-cases include adding to the model the ability to generate in certain styles, or better generate certain subjects or actions. One can even chain multiple hypernetworks together to further modify the model.
59
1
Are score_tags neccessary in PDXL/SDXL Pony Models?  |  Halloween2024

Are score_tags neccessary in PDXL/SDXL Pony Models? | Halloween2024

Consensus is that the latest generation of Pony SDXL models no linger require "score_9 score_8 score_7" written in the prompt to "look good".//----//It is possible to visualize our actual input to the SD model for CLIP_L ( a 1x768 tensor) as a 16x16 grid , each with RGB values since 16 x 16 x 3 = 768I'll assume CLIP_G in the SDXL model can be ignored. Its assumed CLIP_G is functionally the same but for 1024 dimension instead of 768.So the here we have the prompt : "score_9 score_8_up score_8_up"Then I can do the same but for the prompt : "score_9 score_8_up score_8_up" + XWhere X is some random extremely sus prompt I fetch from my gallery. Assume it to fill up to the full 77 tokens (I set truncate=True on the tokenizer so it just caps off past the 77 token limit)Examples:etc. etc.Granted , first three tokens in the prompt for the 768 encoding greatly influnces the "theme" of the output.But from above images one can see that the "appearance" of the text encoding can vary a lot.Thus , the "best" way to write a prompt is rarely universal.Here I'm running some random text I write myself to check similarity to our "score prompt" (top result should be 100% , so I might have some rounding error) :score_6 score_7_up score_8_up : 98.03% score 8578 : 85.42% highscore : 82.87% beautiful : 77.09% score boobs score : 73.16% SCORE : 80.1% score score score : 83.87% score 1 score 2 score 3 : 87.64% score : 80.1% score up score : 88.45% score 123 score down : 84.62%So even though the model is trained for "score_6 score_7_up score_8_up"we can be kinda loose in how we want to phrase it , if we want to phrase it.Same principle applies for all LoRA and their activation keywords.Negatives are special. The text we write in the negatives are split by whitespace , and the chunks are encoded individually.Link to Notebook if you want to run your own tests:https://huggingface.co/datasets/codeShare/fusion-t2i-generator-data/blob/main/Google%20Colab%20Jupyter%20Notebooks/fusion_t2i_CLIP_interrogator.ipynbI use this thing to search up prompt words using the CLIP_L model//---//These are the most similiar items to the Pony model "score prompt" within my text corpusItems of zero similarity (perpendicular) negative similarity (vector at opposite direction) to encoding are omitted from these results.Note that this are encodings similiar to the "score prompt" trigger encoding , not analysis of what the Pony Model considers good quality.Prompt phrases among my text corpus most similiar to "score_9 score_8_up score_8_up" according to CLIP (the peak of the graph above): Community: sfa_polyfic - 68.3 % holding blood ephemeral dream - 68.3 % Excell - 68.3 % supacrikeydave - 68.3 % Score | Matthew Caruso - 67.8 % freckles on face and body HeadpatPOV - 67.8 % Kazuno Sarah/Kunikida Hanamaru - 67.8 % iers-kraken lun - 67.8 % blob whichever blanchett - 67.6 % Gideon Royal - 67.6 % Antok/Lotor/Regris (Voltron) - 67.6 % Pauldron - 66.7 % nsfw blush Raven - 66.7 % Episode: s08e09 Enemies Domestic - 66.7 % John Steinbeck/Tanizaki Junichirou (Bungou Stray Dogs) - 66.7 % populism probiotics airspace shifter - 65.4 % Sole Survivor & X6-88 - 65.4 % Corgi BB-8 (Star Wars) - 65.4 % Quatre Raberba Winner/Undisclosed - 65.2 % resembling a miniature fireworks display with a green haze. Precision Shoot - 65.2 % bracelet grey skin - 65.2 % Reborn/Doctor Shamal (Katekyou Hitman Reborn!)/Original Male Character(s) - 65.2 % James/Madison Li - 65.1 % Feral Mumintrollet | Moomintroll - 65.1 % wafc ccu linkin - 65.1 % Christopher Mills - 65.0 % at Overcast - 65.0 % Kairi & Naminé (Kingdom Hearts) - 65.0 % with magical symbols glowing in the air around her. The atmosphere is charged with magic Ghost white short kimono - 65.0 % The ice age is coming - 65.0 % Jonathan Reid & Bigby Wolf - 65.0 % blue doe eyes cortical column - 65.0 % Leshawna/Harold Norbert Cheever Doris McGrady V - 65.0 % foxtv matchups panna - 65.0 % Din Djarin & Migs Mayfeld & Grogu | Baby Yoda - 65.0 % Epilogue jumps ahead - 65.0 % nico sensopi - 64.8 % 秦风 - Character - 64.8 % Caradoc Dearborn - 64.8 % caribbean island processing highly detailed by wlop - 64.8 % Tim Drake's Parents - 64.7 % probiotics hardworkpaysoff onstorm allez - 64.7 % Corpul | Coirpre - 64.7 % Cantar de Flor y Espinas (Web Series) - 64.7 % populist dialog biographical - 64.7 % uf!papyrus/reader - 64.7 % Imrah of Legann & Roald II of Conte - 64.6 % d brown legwear - 64.6 % Urey Rockbell - 64.6 % bass_clef - 64.6 % Royal Links AU - 64.6 % sunlight glinting off metal ghost town - 64.6 % Cross Marian/Undisclosed - 64.6 % ccu monoxide thcentury - 64.5 % Dimitri Alexandre Blaiddyd & Summoner | Eclat | Kiran - 64.5 %
47
4
My Personal Guide to Choosing the Right AI Base Model for Generate Halloween2024 Images

My Personal Guide to Choosing the Right AI Base Model for Generate Halloween2024 Images

Simple comparison of the models (Base on Personal opinion)1. SDXL: Best for producing high-quality, realistic images and works well with various styles. It excels in detail enhancements, especially for faces, and offers many good LoRA variations. It generates large, sharp images that are perfect for detailed projects. However, some images may appear distinctly "AI-generated," which might not suit everyone's preference.2. Pony Diffusion: Known for its artistic flexibility, it doesn’t copy specific artist styles but gives beautiful, customizable results. It is also fine-tuning capable, producing stunning SFW and NSFW visuals with simple prompts. Users can describe characters specifically, making it versatile for various creative needs.3. SD3: Focuses on generating realistic and detailed images, offering more control and customization than earlier versions. Despite the many controversies surrounding SD3, SD3 is also widely used in Comfyui.4. Flux: Ideal for fixing image issues like anatomy or structure problems. It enhances image quality by adding fidelity and detail, particularly in text and small image elements, can provide a clearer concept, better prompt implementation with more natural depiction. 5. Kolors: Great for styling, and make colorful and vibrant artwork, especially in fantasy or creative designs.6. Auraflow: Specializes in smooth, flowing images, often with glowing or ethereal effects, perfect for fantasy or sci-fi themes.And if you want to combine the best of different AI models? you can try my workflow or my ai tool:SDXL MergeSimple - this simple workflow can merge 2 checkpoints with the same base, Pony + FLUX Fixer - and you can try this ai tool if you want to merging 2 different base, since FLUX good at fixing image, text, and small detail, so it will be effective without having to work twice.Finally, all of this is my personal opinion from what I experienced, How about you? do you have a different opinion? and which model do you prefer? share your thoughts in the comments below! let's open the discussion!
5
LoRA Training for Stable Diffusion 3.5

LoRA Training for Stable Diffusion 3.5

Full article can be found here : Stable Diffusion 3.5 Large Fine-tuning TutorialImages should be cropped into these aspect ratios:If you need help automatically pre-cropping your images, this is a lightweight, barebones [script](https://github.com/kasukanra/autogen_local_LLM/blob/main/detect_utils.py) I wrote to do it. It will find the best crop depending on:(1024, 1024), (1152, 896), (896, 1152), (1216, 832),(832, 1216), (1344, 768), (768, 1344), (1472, 704)1. Is there a human face in the image? If so, we’ll do the cropping oriented around that region of the image.2. If there is no human face detected, we’ll do the cropping using a saliency map, which will detect the most interesting region of the image. Then, a best crop will be extracted centered around that region.Here are some examples of what my captions look like:k4s4, a close up portrait view of a young man with green eyes and short dark hair, looking at the viewer with a slight smile, visible ears, wearing a dark jacket, hair bangs, a green and orange background k4s4, a rear view of a woman wearing a red hood and faded skirt holding a staff in each hand and steering a small boat with small white wings and large white sail towards a city with tall structures, blue sky with white clouds, cropped If you don't have your own fine-tuning dataset, feel free to use this dataset of paintings by John Singer Sargent (downloaded from WikiArt and auto-captioned) or a synthetic pixel art dataset.I’ll be showing results from several fine-tuned LoRA models of varying dataset size to show that the settings I chose generalize well enough to be a good starting point for fine-tuning LoRA.repeats duplicates your images (and optionally rotates, changes the hue/saturation, etc.) and captions as well to help generalize the style into the model and prevent overfitting. While SimpleTuner supports caption dropout (randomly dropping captions a specified percentage of the time), it doesn’t support shuffling tokens (tokens are kind of like words in the caption) as of this moment, but you can simulate the behavior of kohya’s sd-scripts where you can shuffle tokenswhile keeping an n amount of tokens in the beginning positions. Doing so helps the model not get too fixated on extraneous tokens.Steps calculationMax training steps can be calculated based on a simple mathematical equation (for a single concept):There are four variables here:Batch size: The number of samples processed in one iteration.Number of samples: Total number of samples in your dataset.Number of repeats: How many times you repeat the dataset within one epoch.Epochs: The number of times the entire dataset is processed.There are 476 images in the fantasy art dataset. Add on top of the 5 repeats from multidatabackend.json . I chose a train_batch_size of 6 for two reasons:This value would let me see the progress bar update every second or two.It’s large enough in that it can take 6 samples in one iteration, making sure that there is more generalization during the training process.If I wanted 30 or something epochs, then the final calculation would be this:represents the number of steps per epoch, which is 396.As such, I rounded these values up to 400 for CHECKPOINTING_STEPS .⚠️ Although I calculated 11,900 for MAX_NUM_STEPS, I set it to 24,000 in the end. I wanted to see more of samples of the LoRA training. Thus, anything after the original 11,900 would give me a good gauge on whether I was overtraining or not. So, I just doubled the total steps 11,900 x 2 = 23,800, then rounded up.CHECKPOINTING_STEPS represents how often you want to save a model checkpoint. Setting it to 400 is pretty close to one epoch for me, so that seemed fine.CHECKPOINTING_LIMIT is how many checkpoints you want to save before overwriting the earlier ones. In my case, I wanted to keep all of the checkpoints, so I set the limit to a high number like 60.Multiple conceptsThe above example is trained on a single concept with one unifying trigger word at the beginning: k4s4. However, if your dataset has multiple concepts/trigger words, then your step calculation could be something like this so:2 concepts [a, b]Lastly, for learning rate, I set it to 1.5e-3 as any higher would cause the gradient to explode like so:The other relevant settings are related to LoRA.{ "--lora_rank": 768, "--lora_alpha": 768, "--lora_type": "standard" } Personally, I received very satisfactory results using a higher LoRA rank and alpha. You can watch the more recent videos on my YouTube channel for a more precise heuristic breakdown of how image fidelity increases the higher you raise the LoRA rank (in my opinion).Anyway, If you don’t have the VRAM, storage capacity, or time to go so high, you can choose to go with a lower value such as 256 or 128 .As for lora_type , I’m just going with the tried and true standard . There is another option for the lycoris type of LoRA, but it’s still very experimental and not well explored. I have done the deep-dive of lycoris myself, but I haven’t found the correct settings that produces acceptable results.Custom config.json miscellaneousThere are some extra settings that you can change for quality of life.{ "--validation_prompt": "k4s4, a waist up view of a beautiful blonde woman, green eyes", "--validation_guidance": 7.5, "--validation_steps": 200, "--validation_num_inference_steps": 30, "--validation_negative_prompt": "blurry, cropped, ugly", "--validation_seed": 42, "--lr_scheduler": "cosine", "--lr_warmup_steps": 2400, } "--validation_prompt": "k4s4, a waist up view of a beautiful blonde woman, green eyes""--validation_guidance": 7.5 "--validation_steps": 200 "--validation_num_inference_steps": 30 "--validation_negative_prompt": "blurry, cropped, ugly""--lr_scheduler": "cosine""--lr_warmup_steps": 2400These are pretty self-explanatory:"--validation_prompt"The prompt that you want to use to generate validation images. This is your positive prompt."--validation_negative_prompt"Negative prompt."--validation_guidance"Classifier free guidance (CFG) scale."--validation_num_inference_steps"The number of sampling steps to use."--validation_seed"Seed value when generating validation images."--lr_warmup_steps"SimpleTuner has set the default warm up to 10% of the total training steps behind the scenes if you don’t set it, and that’s a value I use often. So, I hard-coded it in (24,000 * 0.1 = 2,400). Feel free to change this."--validation_steps"The frequency at which you want to generate validation images is set with "--validation_steps". I set mine to 200, which is a 1/2 of 400 (number of steps in an epoch for my fantasy art example dataset). This means that I generate a validation image every 1/2 of an epoch. I suggest generating validation images at least every half epoch as a sanity check. If you don’t, you might not be able to catch errors as quickly as you can.Lastly is "--lr_scheduler" and "--lr_warmup_steps".I went with a cosine scheduler. This is what it will look like:### Memory usageIf you aren’t training the text encoders (we aren’t), `SimpleTuner` saves us about `10.4 GB` of VRAM.![image.png](https://prod-files-secure.s3.us-west-2.amazonaws.com/4e8dae13-2612-4518-91a4-53485ccdba7c/316002db-297b-45a9-b919-cec6b311c773/image.png)With the settings of `batch size` of `6` and a `lora rank/alpha` of `768`, the training consumes about `32 GB` of VRAM.![image.png](https://prod-files-secure.s3.us-west-2.amazonaws.com/4e8dae13-2612-4518-91a4-53485ccdba7c/c2aac70a-8c65-4f6f-b602-487f24de4bd2/image.png)Understandably, this is out of the range of consumer `24 GB` VRAM GPUs. As such, I tried to decrease the memory costs by using a `batch size` of `1` and `lora rank/alpha` of `128` .Tentatively, I was able to bring the VRAM cost down to around `19.65 GB` of VRAM.However, when running inference for the validation prompts, it spikes up to around `23.37 GB` of VRAM.![image.png](https://prod-files-secure.s3.us-west-2.amazonaws.com/4e8dae13-2612-4518-91a4-53485ccdba7c/0c5240d6-6f71-404e-bea7-b18cc35ee5ad/image.png)![image.png](https://prod-files-secure.s3.us-west-2.amazonaws.com/4e8dae13-2612-4518-91a4-53485ccdba7c/026be306-8331-45a2-9c02-541005f2cdfd/image.png)To be safe, you might have to decrease the `lora rank/alpha` even further to `64`. If so, you’ll consume around `18.83 GB` of VRAM during training.![image.png](https://prod-files-secure.s3.us-west-2.amazonaws.com/4e8dae13-2612-4518-91a4-53485ccdba7c/5edcaaf9-bf0d-4db0-a183-cfab44963b8e/image.png)During validation inference, it will go up to around `21.50 GB` of VRAM. This seems safe enough.![image.png](https://prod-files-secure.s3.us-west-2.amazonaws.com/4e8dae13-2612-4518-91a4-53485ccdba7c/bd41ce4e-a0db-443b-b3d2-63eac136779d/image.png)If you do decide to go with the higher spec training of `batch size` of `6` and `lora rank/alpha` of `768` , you can use the `DeepSpeed` config I provided [above](https://www.notion.so/Stable-Diffusion-3-5-Large-Fine-tuning-Tutorial-11a61cdcd1968027a15bdbd7c40be8c6?pvs=21) if your GPU VRAM is insufficient and you have enough CPU RAM.
Exploring DORA, LoRA, and LOKR: Key Insights Before Halloween2024 Training

Exploring DORA, LoRA, and LOKR: Key Insights Before Halloween2024 Training

In the world of artificial intelligence (AI), especially in training image-based models, the terms DORA, LoRA, and LOKR often play different but complementary roles in developing more efficient and accurate AI models. Each has a unique approach to understanding data, adapting models, and involving developers in the process. This article will discuss what DORA, LoRA, and LOKR are in the context of AI image training, as well as their respective strengths and weaknesses.1. DORA (Distributed Organization and Representation Architecture) in AI Image Training DORA is a model better known in the fields of cognitive science and AI, focusing on how systems understand and represent information. Although not commonly used directly in AI image training, DORA's principle of distributed representation can be applied to how models understand relationships between elements in an image—such as color, texture, shape, or objects—and how those elements are connected in a broader context.Strengths: Understanding complex relationships: DORA allows AI models to understand complex relationships between objects in an image, crucial for tasks such as object recognition or object detection.Strong generalization: Helps models learn more abstract representations from visual data, allowing for object recognition even with variations in form or context.Weaknesses: Less specific for certain visual tasks: DORA may be less optimal for tasks requiring high accuracy in image details, such as image segmentation.Computational complexity: Using a model based on complex representations like DORA requires more computational resources.2. LoRA (Low-Rank Adaptation) in AI Image Training LoRA is a method widely used in AI for fine-tuning large models without requiring significant resources. LoRA reduces model complexity by factoring heavy layers into low-rank representations. This allows for adjustments to large models (such as Vision Transformers or GANs) without retraining the entire model from scratch, saving time and cost.Strengths: Resource efficiency: LoRA enables faster and more efficient adaptation of models, especially when working with large models and smaller datasets.Reduces overfitting: Since only a small portion of the parameters are adjusted, the risk of overfitting is reduced, which is essential when working with limited image datasets.Pretrained model adaptation: LoRA allows for the reuse of large pretrained models trained on vast datasets, making it easier to adapt them to more specific datasets.Weaknesses: Limited to minor adjustments: LoRA is excellent for minor adjustments, but if significant changes are needed or if the dataset differs greatly from the original, the model may still require deeper retraining.Dependent on base model: The best results from LoRA heavily rely on the quality of the pretrained model. If the base model is not strong enough, the adapted results may be unsatisfactory.3. LOKR (Locus of Control and Responsibility) in AI Image Training LOKR, derived from psychology, refers to how a person perceives control and responsibility over something. In the context of AI development, this concept can be applied to how developers feel responsible for and control the training process of the model. Developers with an internal locus of control feel they have full control over the training process, while those with an external locus of control might feel that external factors such as datasets or hardware are more influential.Strengths: Better decision-making: Developers with an internal locus of control are usually more focused on optimizing parameters and trying various approaches to improve results, which can lead to better AI models.High motivation: Developers who feel in control of the training outcomes are more motivated to continuously improve the model and overcome technical challenges.Weaknesses: Challenges with external factors: Developers with an external locus of control might rely too much on external factors such as the quality of the dataset or available hardware, which can limit innovation and control over the training process.Not directly related to AI technicalities: While this concept provides good psychological insights, it does not offer direct solutions in the technical training of AI models.Conclusion DORA, LoRA, and LOKR bring different perspectives to AI image-based training. DORA offers insight into how models can understand complex relationships in images, though it comes with computational challenges. LoRA is highly useful for adapting large models in a more resource-efficient way, but has limitations if larger changes are required. Meanwhile, LOKR, although derived from psychology, can influence how AI developers approach training, especially in terms of control and responsibility. By understanding the strengths and weaknesses of each approach, developers can more effectively choose the method that best fits the specific needs of their AI projects, maximizing both efficiency and model performance in processing images.
Halloween2024 - ComfyUI experiences

Halloween2024 - ComfyUI experiences

Hello everyone.I have been working more intensively with various AI tools in the last few days and weeks. In this article I would like to briefly share my opinion on the "workflows" that you can create with ComfyUI.First of all, my computer is not the "more expensive, faster, better" type. It is a Ryzen 5 with a GForce 3060 Ti. So it is not bad, but by far not the best for training LoRAs, checkpoints or other AI things. It simply takes longer than with a Ryzen 9 and a GForce 4090 ;)But back to ComfyUI and the workflows.Since I have only been working with it for a few days, before that I used A1111 (Stable Diffusion), I am of course far from someone who can give you tips if you have problems. But one thing is certain: ComfyUI is definitely extremely faster than A1111 when creating images.With my current setup, I need over 2 minutes per XL image and almost 5 minutes for FLUX-based images with A1111. Anyone who can do a bit of math knows that this is really incredibly slow...ComfyUI, on the other hand, even with my setup, needs less than 20 seconds for an XL image and almost 60 seconds for a FLUX-based image. Of course, that depends on the workflow.The problem with ComfyUI, in my opinion, is that it is not at all beginner-friendly. There is a "standard" workflow, but that is not enough. After all, we want to integrate or test various checkpoints, LoRAs or other things.So you start and look at the different options... and then... then you don't know what to do next. So without looking at various documentation or examples, you will have an extremely difficult time understanding this tool.If we take the "fresh" installation of ComfyUI, after a long browse you will find that the things you actually want are "not" there. This includes things like using placeholders or a "better" way to save the files you create.This brings us to the possible extensions. Like in so many other communities, there are a huge number here. Unfortunately, this also makes things very confusing. Again, you have to look closely at what you want, need or expect, but even then it doesn't mean that the extension does what you want.The worst thing about ComfyUI in my opinion is the confusing menu and it gets worse with every extension. If you just look at the "Workflow" tool here in Tensort.Art, you immediately understand what I mean.Still. ComfyUI is a very good and powerful tool. Most importantly, it is much faster than the other tools I have tried so far. I also really like the flexibility of the tool. However, it could have a "better" menu to make it more user-friendly.If you haven't done it before: It's worth to check it out.
4
2
How to transform your images into a Halloween party atmosphere. | 🎃 Halloween 2024

How to transform your images into a Halloween party atmosphere. | 🎃 Halloween 2024

INSTRUCTIONS:This is a very simple workflow, just upload your image and press RUN.PROMPT basically does not need to be modified, but you can still add more Halloween elements to make the theme richer.Hope you all have a good time.PROMPT:(masterpiece), ((halloween elements)),a person, halloween striped thighhighs, witch hat, grin, (ghost), sweets, candy, candy cane, cookie, string of flags, halloween costume, jack-o'-lantern bucket, halloween, pumpkins,black cat,halloween,little ghost,magic robe,autumn leaves,candle,skull, 3d cg.Negative PROMPT:None.Below is the workflow link:https://tensor.art/workflows/786144487641608308Below is the AI-tool link:https://tensor.art/template/786150277257599620model used:CKPThttps://tensor.art/models/757279507095956705/FLUX.1-dev-fp8
61
35
50 Inspiration Beauty Monster or Creature  - HALLOWEEN2024

50 Inspiration Beauty Monster or Creature - HALLOWEEN2024

Looking to stand out this Halloween with a fierce, captivating costume? Dive into our 50 Beauty Monster and Creature Inspirations for Halloween 2024!From the alluring vampire queen with fangs and pale skin, to the mystical forest spirit with branches for hair, this list features a variety of iconic, feminine creatures to embody. Each entry provides five key characteristics to make your costume pop with creativity. Whether you want elegance, spookiness, or a combination of both, these ideas will help you slay this Halloween!Vampire: Fangs, cloak, pale skin, red lips, pointed ears.Witch: Pointed hat, broomstick, black dress, potion bottles, striped stockings.Medusa: Snake hair, stony gaze, green skin, gold jewelry, ancient toga.Banshee: Ghostly white dress, flowing hair, haunting scream, pale makeup, chains.Succubus: Bat wings, red dress, horns, glowing eyes, tail.Werewolf: Furry ears, sharp claws, fangs, torn clothes, wild hair.Mermaid: Scales, seashell bra, fishtail, wet-look hair, pearls.Harpy: Feathered wings, talons, bird-like eyes, fierce expression, ragged clothes.Fairy: Sparkling wings, flower crown, wand, glittery makeup, light dress.Zombie: Torn clothes, blood stains, decayed skin, lifeless eyes, open wounds.Siren: Wet-look hair, seashell jewelry, seaweed skirt, alluring voice, eerie glow.Elf: Pointed ears, elegant gown, bow and arrow, long hair, ethereal glow.Gorgon: Snake tail, golden scales, slit eyes, regal crown, sharp claws.Mummy: Wrapped in bandages, dark eye makeup, jewelry, ancient amulet, dusty appearance.Ghost: Flowing white sheet, transparent, eerie wail, glowing eyes, pale hands.Queen of the Dead: Black gown, skull crown, skeletal makeup, dark veil, red roses.Demoness: Red skin, black horns, tail, wings, sharp claws.Bride of Frankenstein: Black and white hair, stitched skin, bride gown, lightning bolts, scars.Voodoo Priestess: Skull face paint, voodoo doll, bones, beads, tribal clothing.Phoenix: Fiery wings, flame patterns, red and orange outfit, glowing skin, feathers.Chimera: Lion mane, snake tail, dragon wings, golden eyes, muscular build.Spider Queen: Black web dress, spider crown, long legs, red eyes, venomous fangs.Lady Death: Black cloak, scythe, skeletal hands, skull mask, dark aura.Nymph: Nature gown, flowers in hair, earthy tones, glowing skin, delicate wings.Selkie: Fur cloak, watery skin, ocean jewels, seal tail, wet hairGiantess: Massive build, oversized clothes, earthy skin, towering presence, big jewelry.Forest Witch: Mossy cloak, animal bones, green skin, potions, tree branches in hair.Dragoness: Scaly skin, horns, tail, fiery breath, armored chestplate.Lilith: Dark wings, black robe, seductive look, glowing red eyes, ancient symbols.Hag: Wrinkled skin, tattered clothes, long nose, hunched posture, warts.Valkyrie: Winged helmet, sword, battle armor, braided hair, shield.Troll Woman: Green skin, sharp tusks, club, fur clothes, wild hair.Ice Queen: Frosted crown, shimmering cape, blue skin, ice staff, glowing cold eyes.Scarecrow: Straw-filled body, stitched mouth, tattered hat, pumpkin head, patched overalls.Djinn: Flowing robes, magic lamp, glowing eyes, ornate jewelry, smoke swirling around.Cheshire Cat: Striped fur, wide grin, cat ears, mischievous eyes, tail.Swamp Creature: Muddy skin, algae hair, webbed fingers, water plants, gills.Basilisk Queen: Reptilian skin, glowing eyes, snake tail, venomous fangs, ancient armor.Lamia: Snake body, golden armor, hypnotic eyes, deadly claws, venomous bite.Wendigo Woman: Deer antlers, skeletal body, glowing eyes, fur cloak, sharp claws.Shadow Witch: Black shadowy figure, dark veil, glowing red eyes, spectral form, floating.Frost Maiden: Icicle crown, snowflake gown, pale blue skin, icy breath, shimmering frost.Baba Yaga: Hunched back, long nose, flying broom, warts, iron teeth.Kitsune: Fox ears, fluffy tail, red kimono, mystical powers, mask.Forest Spirit: Tree branches for hair, bark-like skin, moss gown, glowing eyes, ethereal glow.Plague Doctoress: Black cloak, plague mask, long gloves, eerie eyes, dark potions.Dullahan: Headless woman, flowing black cloak, horse-riding, holding a skull, eerie lantern.Succubus Queen: Leather bodice, wings, horns, glowing eyes, seductive aura.Dryad: Bark skin, leaves in hair, tree branches for arms, glowing green eyes, earthy gown.Banshee Queen: Flowing black dress, ghostly hair, skeletal hands, pale skin, sorrowful wail.settings usedAll created using Juggernaut SDXL modelsteps 25cfg 6dpmpp_2m karrasnot all creature recognize well by the checkpoint, you may use LoRA or other checkpoint if needed to create certain characterWith these 50 beauty monster and creature inspirations, you're all set to embrace the eerie, enchanting side of Halloween 2024. Whether you choose to transform into a seductive vampire, a magical forest spirit, or a chilling banshee queen, each idea is designed to make you stand out in both style and spookiness. Let your creativity soar this Halloween, and enjoy bringing these unique creatures to life. Get ready to slay (literally!) with hauntingly beautiful looks that will leave everyone spellbound!
79
12
Algunos cambios / some changes

Algunos cambios / some changes

He actualizado todos mis modelos para que la gente pueda generar imágenes de manera ilimitada y gratuita con ellos, la descarga sigue sujeta al pago del bufet, asi que adelante, den rienda suelta a su creatividad.//I've updated all my models so that people can generate unlimited images with them for free, downloading them is still subject to paying the buffet, so go ahead and unleash your creativity.
42
12
🎃 Halloween2024 | Optimizing Sampling Schedules in Diffusion Models

🎃 Halloween2024 | Optimizing Sampling Schedules in Diffusion Models

You migh have seen this kind of images in the past if you've girly tastes when navigate on pinterest, well guess what? I'll teach you about some parammeters to enhance your Pony SDXL future generations. It's been a while since my last post, today I'll teach you about a cool feature launched by NVIDIA on July 22, 2024. For this task I'll provide an alternative workflow (Diffusion Workflow) for SDXL. Now lets go with the content.ModelsFor my research (AI Tool) I decided to use the next models:Checklpoint model: https://tensor.art/models/757869889005411012/Anime-Confetti-Comrade-Mix-v30.60 LoRA: https://tensor.art/models/7025156632998356040.80 LoRA: https://tensor.art/models/757240925404735859/Sailor-Moon-Vixon's-Anime-Style-Freckledvixon-1.00.75 LoRA: https://tensor.art/models/685518158427095353NodesThe Diffusion Workflow has many nodes I've merged in single nodes I'll explain them below, remember you can group nodes and edit their values to enhance your experience.👑 Super Prompt Styler // Advanced Manager (CLIP G) text_positive_g: positive prompt, subject of the scene (all the elements the scene is meant for, LoRA Keyword activators).(CLIP L) text_positive_l: positive prompt, all the scene itself is meant (composition, lighting, style, scores, ratings).text:negative: negative prompt.◀Style▶: artistic styler, select the direction for your prompt, select 'misc Gothic' for halloween direction.◀Negative Prompt▶: prepares the negative prompt splitting it in two (CLIP G and CLIP L) for the encoder.◀Log Prompt▶: add information to metadata, produces error 1406 when enabled, so turn it off.◀Resolution▶: select the resolution of your generation.👑 Super KSampler // NVIDIA Aligned Stepsbase_seed: similar to esnd (know more here).similarity: this parameter influences base_seed noise to be similar to noise_seed value.noise_seed: the exact same noise seed you know.control after generate: dictates the behavior of noise_seed.cfg: guidance for the prompt, read about <DynamicThresholdingFull> to know the correct value. I recomend 12sampler_name: sampling method.model_type: NVIDIA sampler for SDXL and SD models.steps: the exact same steps you know, dictates how much the sampling denoises the noise injected.denoise: the exact same denoise you know, dictates the strong the sampling denoises the noise injected.latent_offset: select between {-1.00 Darker to 1.00 Brighter} to modify the input latent, any value different than 0 adds information to enhance final result.factor_positive: upscale factor for the conditioning.factor_negative: upscale factor for the conditioning.vae_name: the exact same vae you know, dictates how the noise injected is denoised by the sampler.👑 Super Iterative Upscale // Latent/on Pixel Spacemodel_type: NVIDIA sampler for SDXL and SD models.steps: number of steps the UPSCALER (Pixel KSampler) will use to correct the latent on pixel space while upscaling it.denoise: dictates the strenght of the correction on the latent on pixel space.cfg: guidance for the prompt, read about <DynamicThresholdingFull> to know the correct value. I recomend 12upscale_factor: number of times the upscaler will upscale the latent (must match factor_positive and factor_positive) upscale_steps: dictates the number of steps the UPSCALER (Pixel KSampler) will use to upscale the latent.MiscellaneousDynamicThresholdingFullmimic_scale: 4.5 (Important value. go to learn more)threshold_percentile: 0.98mimic_mode: half cosine downmimic_scale_min: 3.00cfg_mode: half cosine downcfg_scale_min: 0.00sched_val: 3.00separate_feature_channels: enablescaling_starpoint: meanvariability_measure: ADinterpolate_phi: 0.85Learn more: https://www.youtube.com/watch?v=_l0WHqKEKk8Latent OffsetLearn more: https://github.com/spacepxl/ComfyUI-Image-Filters?tab=readme-ov-file#offset-latent-imageAlign Your StepsLearn more: https://research.nvidia.com/labs/toronto-ai/AlignYourSteps/LayerColor: Levelsset black_point = 0 (base level of black)set white_point = 255 (base level of white)Set output_black_point = 20 (makes blacks less blacks)Set output_white_point = 220 (makes whites less whites)Learn more: https://docs.getsalt.ai/md/ComfyUI_LayerStyle/Nodes/LayerColor%3A%20Levels/LayerFilter:Filmcenter_x: 0.50center_y: 0.50saturation: 1.75vignete_intensity: 0.20grain_power: 0.50grain_scale: 1.00grain_sat: 0.00grain_shadows: 0.05grain_highs: 0.00blur_strenght: 0.00blur_focus_spread: 0.1 focal_depth: 1.00Learn more: https://docs.getsalt.ai/md/ComfyUI_LayerStyle/Nodes/LayerFilter%3A%20Film/?h=filmResultAi Tool: https://tensor.art/template/785834262153721417DownloadsPony Diffusion Workflow: https://tensor.art/workflows/785821634949973948
13
6
The Trials and Tribulations of a Halloween2024 Face Swap through Facepaint work in FLUX1D

The Trials and Tribulations of a Halloween2024 Face Swap through Facepaint work in FLUX1D

So I set out with what I thought was a simple idea:“Start with an image of someone’s face and turn that into a spooky Halloween character, with costume, makeup and full Facepaint with a spooky background.”BUT it had to look enough like them at the end - that they would be pleased with the result…The starting point was easy - I wanted to train a Halloween LoRA on lots of images of people wearing Halloween Facepaint - so I did that…A couple of the 48 images i used to train with:So I had a Flux LoRA - now I tested that in Tensor.Art with simple “Man in Halloween Facepaint”, “Woman in Halloween Facepaint”So far so good, I thought ok, this is going to be easy peasy!At this point (End of September 2024) there were limited options in TA for Flux Face swap… (No Pulid available then) so I started trying with Facedetailer…I built out the workflow - made a separate flow for the background - and was all excited…But no matter what i tried (and I tried a lot!) the facedetailer would wipe out the Facepaint from the Lora - restoring the face back to the original person, nice and clean, or with a half hearted smear of greasepaint.Or it would look nothing at all like the person and the makeup would look like it was a badly stuck on mask…So i went back to my Discord buddies and we talked about the options - and decided to try Reactor nodes with insightface…It would generate a Florence description of the original reference face (cropped) - build a dummy Halloween Image with a lookielikie from the description and with Facepaint - and then reactor the ref face back over the top (or so i thought)But the Reactor’d one cleaned up the face and removed 90% of the makeup and it didn’t want to do the costume or background at all the way I had envisaged… as soon as I gave it enough freedom to be creative, the reference person was lost completely…I think by now people in all my discord groups were sick of me asking for ideas on how to do this - I tried every setting and balance on reactor nodes.Could I use an llm to rewrite the visual description of the face to include the Halloween description first, and so on.I looked at IPAdapter and using Depth maps - but although they captured the shape of the face - they couldn’t preserve the familiar features through costume stylemakeup.At this point - I pretty much gave up in disgust… I put out a final round of help requests on various discord’s and went onto another projectA few days later my good friend told me “ hey - finally they released Pulid for Flux on TA!” - and I already had built Flux Pulid workflows for face swapping the previous week on my MimicPC Cloud version of Comfyui (where you can load any kind of node and model you want and really design and play with freedom) so I started to regain my enthusiasm…I managed to merge some of the earlier ideas for generating the Halloween style with LLM’s and a Joycaption of the cropped reference face - and the Flux Pulid face swaps - and experimented with the positioning of the LoRA to get maximum effect - and was finally able to release a workflow and AI Tool that did what i had seen in my head those few weeks back when I started… https://tensor.art/template/785795972520313546And the workflow - https://tensor.art/workflows/785793305345589081And the LoRA - https://tensor.art/models/785804669831296337If you have enjoyed my article - please like and use my AI Tools and Models…I welcome comments and constructive feedback.
17
9
🎃 Halloween2024 Generation Guide: Elevate Your Spooky Creations! 👻

🎃 Halloween2024 Generation Guide: Elevate Your Spooky Creations! 👻

Halloween is right around the corner, and it’s time to infuse your generation models with a touch of spooky magic! Whether you’re crafting images, stories, or even interactive AI experiences, this guide will help you conjure up the best Halloween-themed content for 2024. Let’s dive into some tips and tricks to make your generative AI creations truly spine-chilling! 🧛‍♂️🕸️1. Theme Selection: Classic Horror vs. Modern ThrillsStart with deciding the tone of your Halloween project. Are you going for classic horror, with haunted houses, creepy forests, and gothic vibes? Or are you leaning towards modern Halloween with neon lights, cyberpunk ghosts, or playful skeletons?Classic horror themes like vampires, witches, and ghosts never go out of style, but blending them with modern elements (think AI-enhanced haunted tech or neon-lit crypts) can bring a fresh twist to your content.2. Prompts and Inspiration IdeasFor image generation, try prompts that capture the Halloween atmosphere:"A haunted Victorian mansion under a full moon, surrounded by fog and dark twisted trees""A neon-lit skeleton playing an electric guitar on a cyberpunk street""A witch stirring a glowing cauldron, with enchanted bats swirling around"For story generation, build a suspenseful atmosphere with prompts like:"On Halloween night, a group of friends discovers a hidden portal in an abandoned amusement park...""A town where every carved pumpkin holds the soul of a spirit seeking freedom"Don't be afraid to add a bit of humor to your Halloween stories, like:"A vampire who’s afraid of the dark trying to overcome his fear"3. Style Adjustments: The Magic of LightingLighting can make or break the eerie ambiance of your Halloween images. Play with shadows, moonlit scenes, or dimly lit rooms to add that sense of unease.Experiment with different color palettes—orange, black, and purple are classics, but consider adding splashes of neon green or eerie blue for a modern twist.For a vintage horror feel, use grainy textures, sepia tones, or black-and-white effects to mimic old horror films.4. Interactive Elements: Make it a Thrilling ExperienceFor those building interactive experiences, consider adding branching storylines where users can explore haunted locations or solve spooky mysteries.Add random elements to make the experience unpredictable—imagine a haunted AI guide that offers different creepy clues each time users interact with it.Build suspense with sound effects like whispering winds, distant footsteps, or creaking doors that play as users engage with your content.5. Community Collaboration: Share and Get Inspired!The best part about generative projects is sharing them with the community! Post your Halloween creations, get feedback, and see how others are getting into the spirit.Participate in Halloween-themed challenges or host one yourself—like a Spookiest Story Contest or Best Halloween Image Generation.Don’t forget to use the hashtag #Halloween2024 when sharing your spooky content so others can easily find and engage with your posts.6. Ethical Considerations: Keep It Fun and RespectfulWhile Halloween is all about embracing the creepy and the supernatural, it's important to remain sensitive to cultural traditions and symbols. Respectful representation goes a long way in keeping the spirit of fun alive for everyone.Ensure that your generative content is age-appropriate if targeting younger audiences—creepy doesn’t always have to mean terrifying!Happy Halloween & Happy Generating! 🎃👻We hope these tips help you create some truly terrifying (or delightfully spooky) Halloween content this year. Let your creativity run wild and embrace the eerie, the whimsical, and the downright strange. Looking forward to seeing what you conjure up this Halloween season!
4
2
HORROR ARTIST AND ART STYLE (Special article for HALLOWEEN2024)

HORROR ARTIST AND ART STYLE (Special article for HALLOWEEN2024)

1. H.R. Giger (Biomechanical Horror) Giger is famous for his nightmarish "biomechanical" art style, blending human forms with machinery and grotesque alien creatures. His designs inspired the terrifying creatures in the Alien film series, making his style a staple in sci-fi horror.2. Junji Ito (Manga Horror) Junji Ito is a Japanese manga artist known for his unsettling and disturbing imagery. His style combines detailed linework with surreal body horror, where human forms often twist, decay, or transform into unimaginable horrors.3. Francis Bacon (Abstract Horror) Bacon’s style is known for its raw and chaotic energy, often depicting distorted, screaming faces and bodies. His abstract approach creates a sense of psychological horror, focusing on human suffering and existential dread.4. Zdzisław Beksiński (Surreal Horror) Beksiński's paintings are filled with surreal, dystopian landscapes and nightmarish creatures. His style is dreamlike, featuring decaying cities, skeletal figures, and eerie, otherworldly atmospheres that evoke a sense of dread and desolation.5. Edward Gorey (Gothic Macabre) Gorey's distinctive pen-and-ink illustrations have a whimsical yet dark, gothic tone. His art features victorian-style settings, eerie characters, and morbid humor, often telling unsettling stories in a playful, minimalist way.6. Clive Barker (Fantasy Horror) Known for creating Hellraiser's Cenobites, Barker's art mixes body horror with fantasy. His style incorporates grotesque, skin-crawling depictions of demons and twisted creatures, blurring the line between pleasure and pain.7. Wayne Barlowe (Dark Fantasy) Barlowe's art focuses on the grotesque, otherworldly creatures of hellish dimensions. His works are often visually complex, mixing detailed anatomy with imaginative designs that are both disturbing and awe-inspiring.8. Dave McKean (Mixed Media Horror) McKean's style is a unique blend of photography, collage, and painting, creating eerie, surreal images that evoke fear through abstraction and texture. His works often appear in horror comics and graphic novels, including collaborations with Neil Gaiman.Each of these artists brings a distinct approach to the horror genre, using their unique styles to evoke fear, unease, or existential dread.
15
6
How install Kohya_SS to Ubuntu WSL under Windows 11

How install Kohya_SS to Ubuntu WSL under Windows 11

How to install Kohya_SS to Ubuntu WSL under Windows 111)Prepare:1.Check CPU virtualization on Windows > Task Manager > Perfomance > CPU > Virtualization: Enabled or Disabled.If Disabled - Access the UEFI (or BIOS). The way the UEFI (or BIOS) appears depends on your PC manufacturer. https://support.microsoft.com/en-us/windows/enable-virtualization-on-windows-c5578302-6e43-4b4b-a449-8ced115f58e12.Make sure you are using a recent version of Windows 10/11. If needed update to the latest version. (No earlier than Windows 10, Version 1903, Build 18362)2)Install WSL and Ubuntu1.Open Terminal > Use the command -wsl --install2.Open the Microsoft Store > Find - Ubuntu. (Ubuntu which doesn't show the version in a name is the latest)3.Install Ubuntu4.Open Ubuntu5.Create profile > For example:Username - UserPassword - User3)Install Kohya_SS on WSL Ubuntu:: Preparesudo apt updatesudo apt install software-properties-common -ysudo add-apt-repository ppa:deadsnakes/ppasudo apt updatesudo apt install python3.10 python3.10-venv python3.10-dev -ysudo apt update -y && sudo apt install -y python3-tksudo apt install python3.10-tksudo apt install git -y:: NVIDIA CUDA Toolkitwget https://developer.download.nvidia.com/compute/cuda/repos/wsl-ubuntu/x86_64/cuda-keyring_1.0-1_all.debsudo dpkg -i cuda-keyring_1.0-1_all.debsudo apt-get updatesudo apt-get -y install cudaexport PATH=/usr/local/cuda-12.6/bin${PATH:+:${PATH}}export LD_LIBRARY_PATH=/usr/local/cuda-12.6/lib64\${LD_LIBRARY_PATH:+:${LD_LIBRARY_PATH}}:: Rebootsudo reboot:: Kohya_ss installcd ~git clone --recursive https://github.com/bmaltais/kohya_ss.gitcd kohya_ssgit checkout sd3-sd3.5-flux./setup.sh:: Configuration settingssource venv/bin/activateaccelerate config>This machine>No distributed training

>No>No>No>All>YesIf you have a RTX 30/40 series video card choose >bf16. If don't have choose >fp16.4)Run Kohya_SS on WSL Ubuntucd kohya_ss./gui.shNotes:To find Kohya_ss folder use \\wsl.localhost\Ubuntu\home\user in Explorer. You can move there a model to train and dataset.Additional commands for Windows Terminal:Shutdown -wsl --shutdownUninstall or reset Ubuntu -wsl --unregister Ubuntu
2
Tensor.Art Becomes World's Largest VisionAI Resource Hosting Platform in Under a Year

Tensor.Art Becomes World's Largest VisionAI Resource Hosting Platform in Under a Year

source: Yahoo FinanceTensor.Art Becomes World's Largest VisionAI Resource Hosting Platform in Under a Year, Empowering Enterprise AIFounded in July 2023, Tensor.Art has seen its global traffic surpass 15 million in less than a year.Currently hosting over 330,000 resources and generating more than 2 million images daily, it has positioned itself as a leading generative AI service platform worldwide. Remarkably, Tensor.Art has already started to turn a profit.As a pioneering explorer of a sustainable Gen AI ecosystem, Tensor.Art provides cloud computing power for model creators and users while offering AI solutions tailored to real-world applications across various industries.Founder Shen, possessing a keen sense of computer and AI technology, quickly decided to enter the AIGC (AI-generated content) market during its early rise. This swift decision led to the establishment of a platform that offers robust support.Tensor.Art is the world's first model platform that supports online inference and online operation of full-scale models. It consistently maintains a keen insight into the latest AI technologies and promptly embraces various cutting-edge advancements, such as the globally popular Stable Diffusion3, HunYuan DiT, Kolors, Flux, and more!As one of the first to deploy StableDiffusion on the cloud, Tensor.Art maintains a keen insight into new AI technologies and rapidly integrates the latest advancements. This includes globally impactful technologies like Stable Diffusion 3, HunYuan DiT, Kolors, Flux, and more.404’s report on Tensor.Art as the world’s first company to hold AI events in 2023Operations head Sawoo states, “We are committed to providing the best platform and community for AI enthusiasts and model creators.As early as 2023, we were pioneers in the AIGC platform space, hosting diverse events and launching creator incentive programs, which have since been emulated by competitors like CivitAI.Moreover, we tirelessly promote new global technologies, ensuring rapid online integration and training capabilities.With a comprehensive community ecosystem and rich activities, Tensor.Art now leads the global growth in new foundational models, growing at 5-6 times the rate of other leading competitors, earning praise from AI enthusiasts and model creators worldwide.”A successful collaboration between Tensor.Art and SnapChatIn an effort to democratize AI and make generative services more accessible, Tensor.Art has explored numerous real-world applications.For instance, in February 2024, the platform used its AI generative capabilities in collaboration with SnapChat to create a new paradigm in creativity through AR.Subsequent partnerships include renowned tattoo artists from Austria, a famous sticker website in the UK, and an architectural firm in Turkey, offering AI-generated design inspiration.API Service:https://tams.tensor.art/Additionally, Tensor.Art is committed to serving the B2B sector by providing a GPU API platform and simplified AI tool workflows, significantly lowering the AI adoption barrier for enterprises and catering to customized needs. This makes AI services more accessible and efficient, enhancing corporate productivity and creative inspiration.Looking ahead, Tensor.Art will maintain its competitive edge by continuing to explore and quickly integrate new global technologies while also launching its own large models. This vision aims to offer an even better community experience and technical capabilities for AI enthusiasts and model creators.
11
Flux Ultimates Custom Txt 2 Vid Tensor Workfkow

Flux Ultimates Custom Txt 2 Vid Tensor Workfkow

Welcome to Dream Diffusion FLUX ULTIMATE, TXT 2 VID With its own custom workflow made for Tensor Arts Comfy Workspace. The workflow can be downloaded on this page....... ENJOYThis is a 2nd stage Trained checkpoint to its predecessor FLUX HYPER.When you think you had it nailed in the last version and notice a 10% margin that could still be trained........ Well that's what happened ..So now this version has even more font styles, Better adherence, Sharper image clarity and a better grasp for anime, water painting and such on....This model has the same setting parameters as Flux HyperPrompt Example : Logo in neon lights, 3D, colorful, modern, glossy, neon background,with a huge explosion of fire with epic effects, the text reads  "FLUX ULTIMATE , GAME CHANGER ",Set steps at : 20Sampler : DPM++ 2M or EULER Gives best resultsScheduler : SimpleDenoise : 1.00Image Size : 576 x 1024 or 1024 x 576 You can choose any size but this model is optimized for faster rendering with those sizes.Download the links from below and save them to your comfy folders...Comfy Workflow :  https://openart.ai/workflows/maitruclam/comfyui-workflow-for-flux-simple/iuRdGnfzmTbOOzONIiVVVae download this to your Vae folder inside of your model folderDownload them from: https://huggingface.co/black-forest-labs/FLUX.1-schnell/tree/main/vaeClip:  download clip_l.safetensors and t5xxl_fp8_e4m3fn.safetensors download these 2 and save them to your clip folder inside of your models folderDownload them from : https://huggingface.co/comfyanonymous/flux_text_encoders/tree/mainIf you have any questions or issues feel free to drop a comment below and I will get back to you as soon as I can. Enjoy  DICE
83
43