The Traditional Way of Generating AI Images for the Beginner
If you are a beginner in the AI community, maybe you will be very confused and have no clue about what is "Node", and "Workflow" and their relations with "AI Tools" in the TensorArt
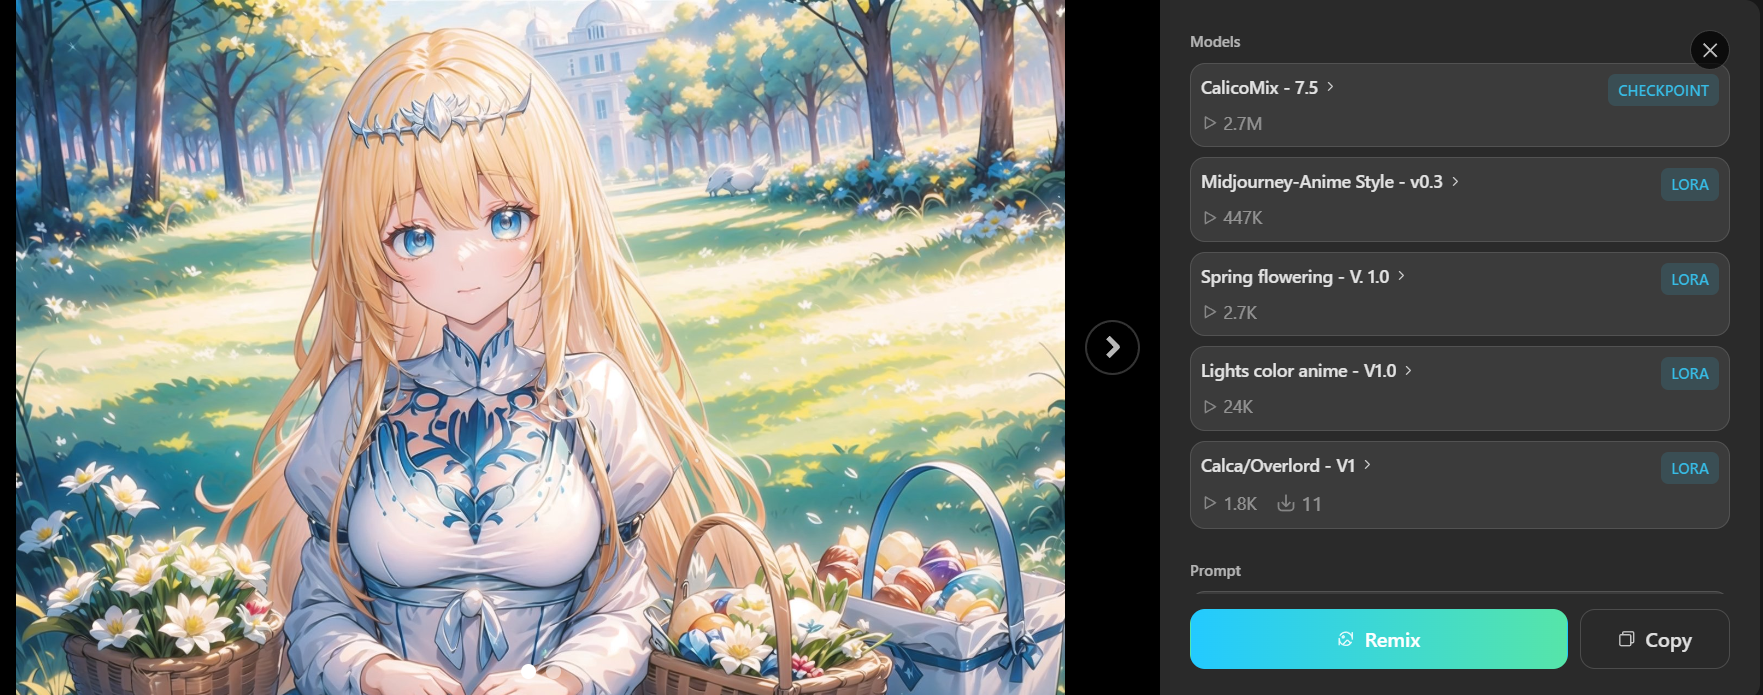
To start with the most simple way. We need to first mention how the user generates an image using a "Remixing" button that brings us to the "Normal Creation menu"

Needless to say, by just editing the prompt (what you would like to see your picture look like) and negative prompt (what you do not want to see in the output image). Then push the Generate button, and the wonderful AI tool will kindly draw the new illustration serving you within a minute!!!!
That sounds great, don't you think? If we imagine how humans spent a huge amount of time in the past to publish just 1 single piece of art. (Yeah, today, in 2024, in my personal opinion, both AI and human abilities are still not fully replaceable, especially in the terms of beautiful perfect hand :P )
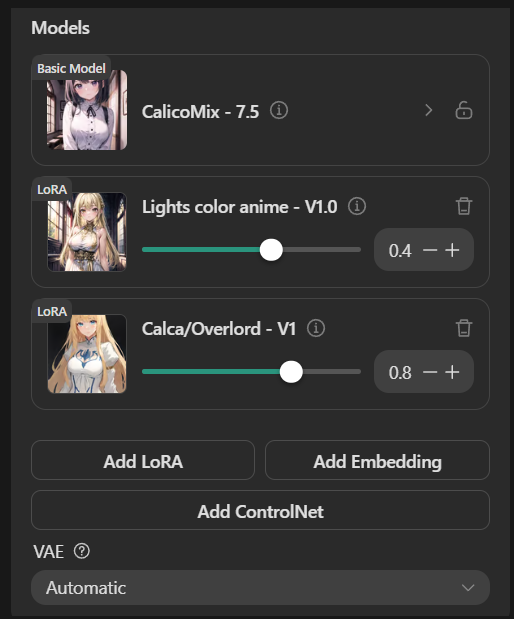
However, the backbone or what happens behind the User-friendly menu allows us to "Select model", "Add LoRA", "Add ControlNet", "Set the aspect ratio (the original size of the image)" and so on, all of them are collected "Node" in a very complex "Workflow"
PS.1. The Checkpoint or The Model often refers to the same thing. They are the core program that had been trained to draw the illustration. Each one has its strengths and weaknesses (I.E. Anime oriented or Realistic oriented)
PS.2. The LoRA (Low-Rank Adaptation) is like an add-on to the Model allowing it to adapt to a different style, theme, and user preference. A concrete example is the Anime Character LoRA
PS.3 The ControlNet is like a condition setting of the image. It helps the model to truly understand what is beyond the text prompt can describe. For instance, how a character poses in each direction and the angle of the camera.
So here comes "The Comfyflow" (the nickname of the Workflow, people also mentioned it by the name "ComfyUI") which gives me a super headache when I see things like this for the first time in my life!!!!!!!!!
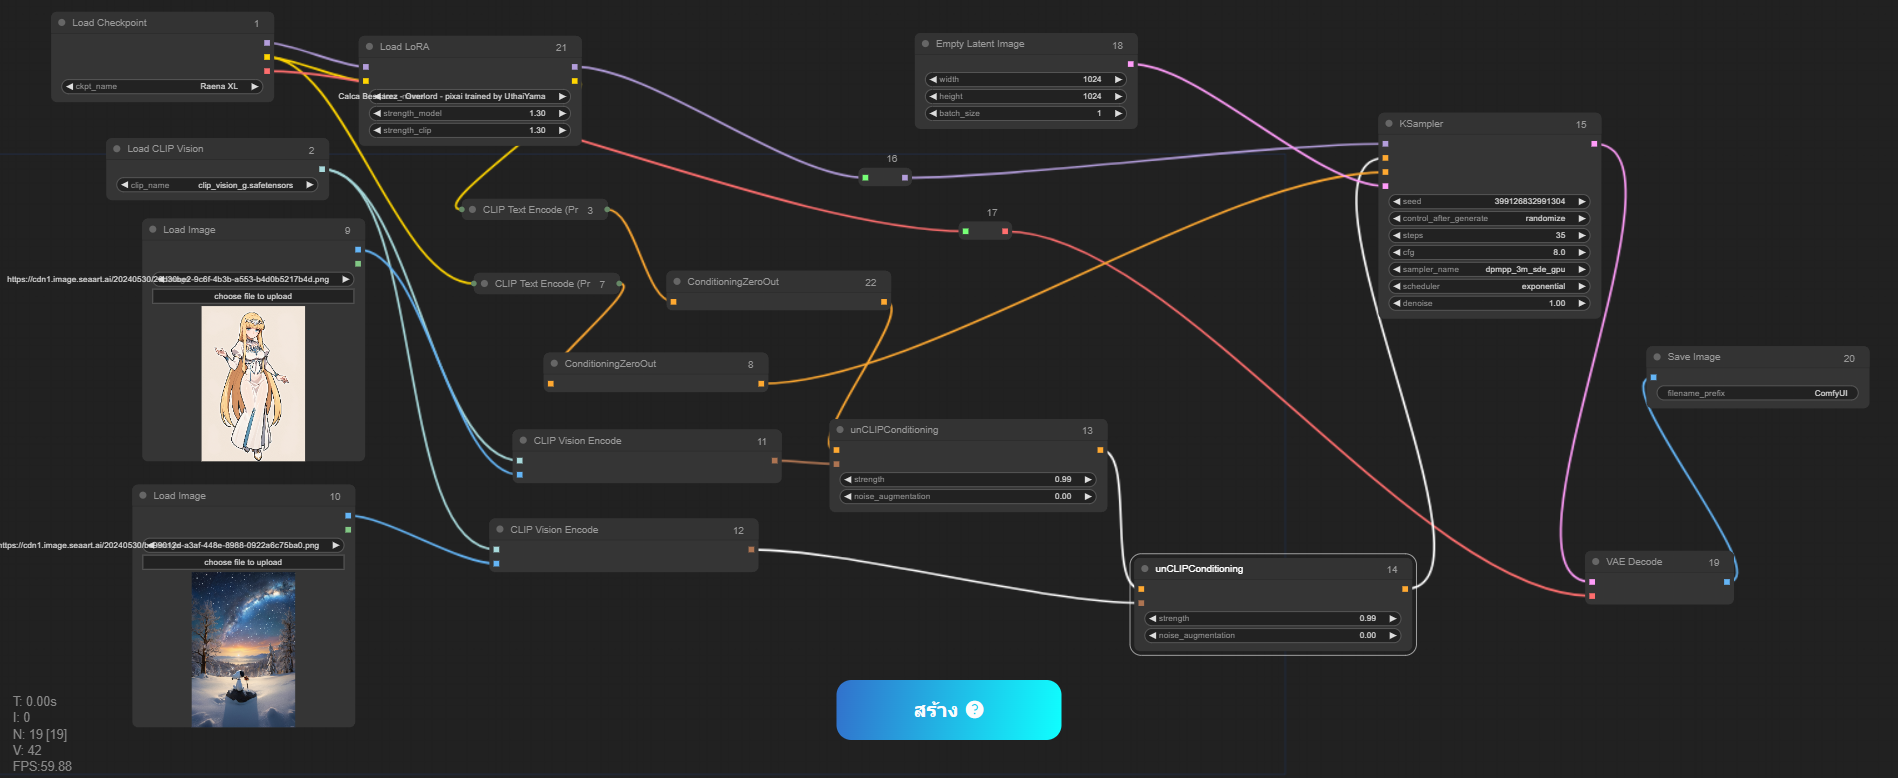
(This image is a flow I have spent a lot of time studying, it is a flow for combining what is in the two images into a single one)
Yeah, maybe, it is my fault that did not go to class about the workflow from the beginning or search for the tutorial on YouTube the first time (as my first language is not English). But would it be better if we had an instructor to tell us step-by-step here in Tensor.Art
And that is the reason why I got inspired to write this article solely for the beginner. So let's start with the main content of the article.
What is ComfyFlow
ComfyFlow or the Workflow is an innovative AI image-generating platform that allows users to create stunning visuals with ease. To get the most out of this tool, it's important to understand two key concepts: "workflow" and "node." Let's break these down in the simplest way possible.
What is a Workflow?
A workflow is like a blueprint or a recipe that guides the creation of an image. Just as a recipe outlines the steps to make a dish, a workflow outlines the steps and processes needed to generate an image. It’s a sequence of actions that the AI follows to produce the final output.
Think of it like this:
Recipe (Workflow): Tells you what ingredients to use and in what order.
Ingredients (Nodes): Each step or component used in the recipe.
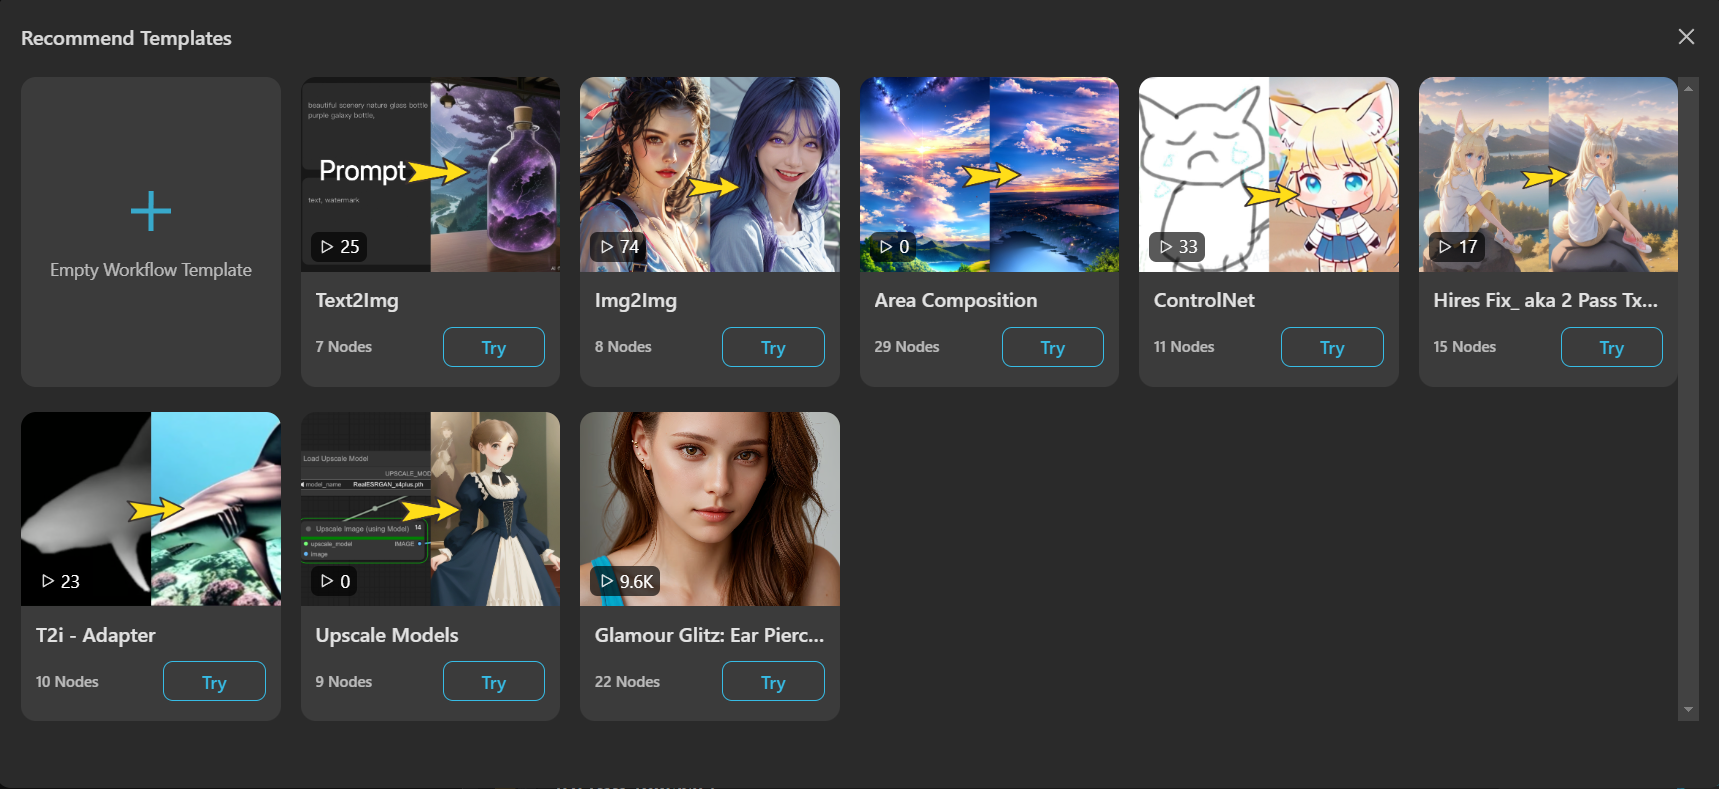
Despite the recommended pre-set template that TensorArt kindly gives to the users, from the beginner view's viewpoint without the knowledge of the workflow, it is not that helpful because, after clicking the "Try" button, we will bombarded with the complexity of the Node!!!!!!!
What is a Node?
Nodes are the building blocks of a workflow. Each node represents a specific action or process that contributes to the final image. In ComfyFlow, nodes can be thought of as individual steps in the workflow, each performing a distinct function.
Imagine nodes as parts of a puzzle:
Nodes: Individual pieces that fit together to complete the picture (workflow).
How Do Workflows and Nodes Work Together?
1-2) Starting Point: Every workflow begins with an initial node, which might be an image input from the user, together with Checkpoint and LoRA serving the role of image references.
3-4) Processing Nodes: These are nodes that draw or modify the image in some way, such as adding color, or texture, or applying filters.
5) Ending Point: The node outputs the completed image which works very closely with the node of the previous stage in terms of sampling and VAE
PS. A Variational Autoencoder (VAE) is a generative model that learns input data, such as images, to reconstruct and generate new, similar, or variations of images based on the patterns it has learned.
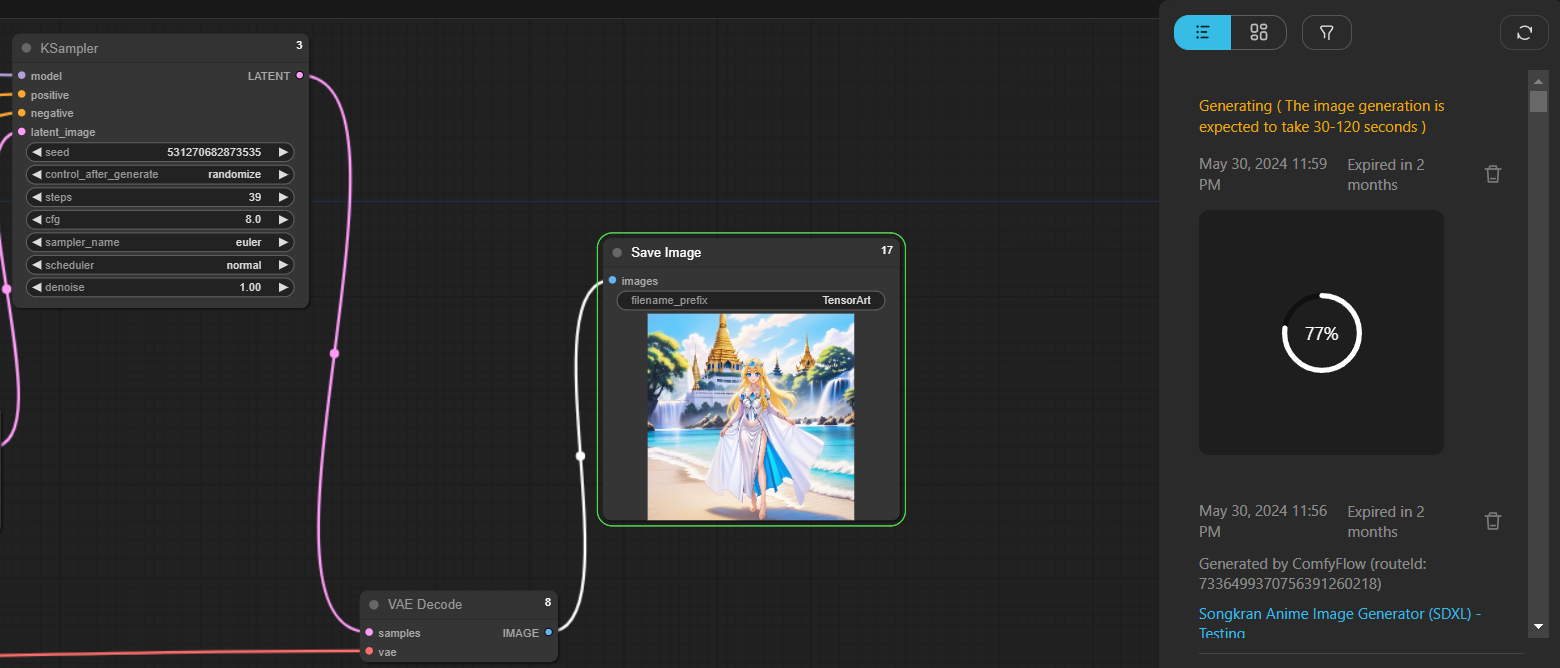
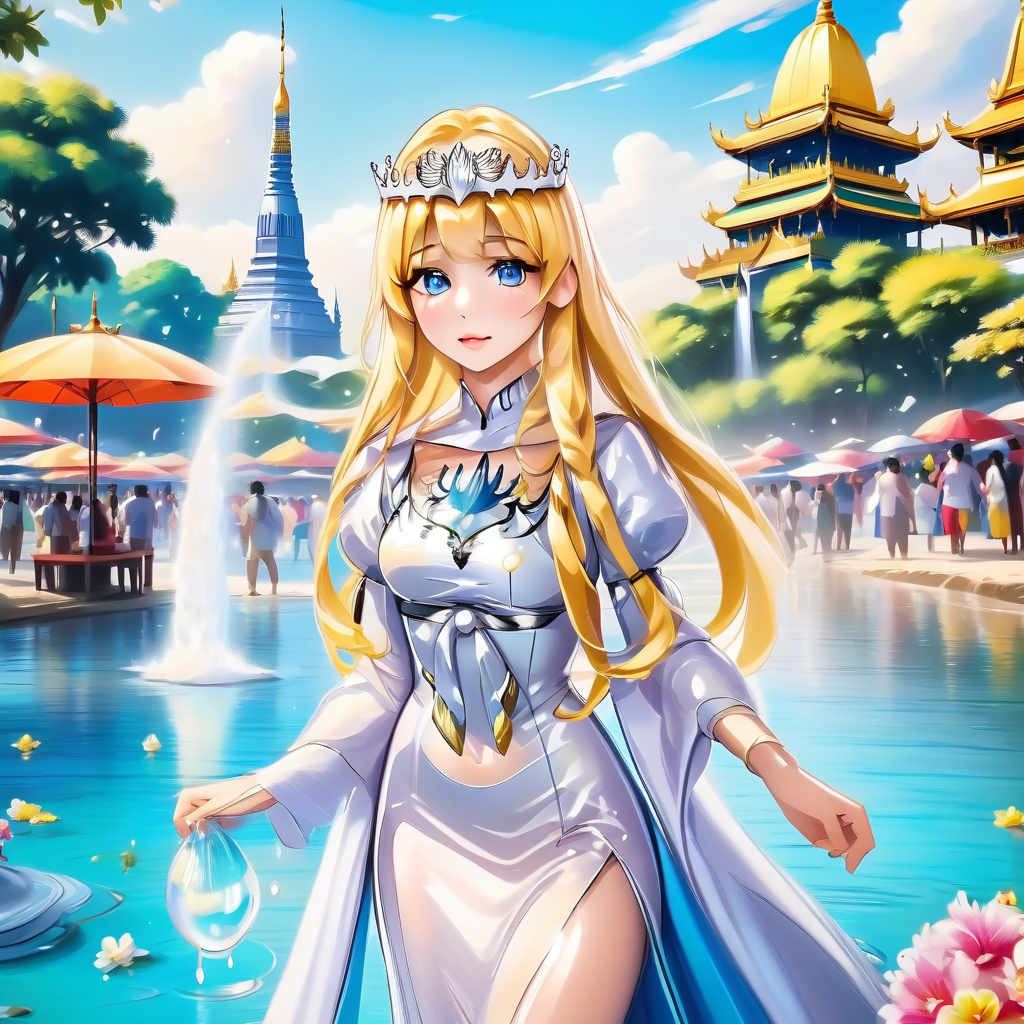
Here is the list of nodes I have used in the normal image-generating images of my Waifu using 1checkpoint, and 2LoRAs to help the reader understand how ComfyFlow works
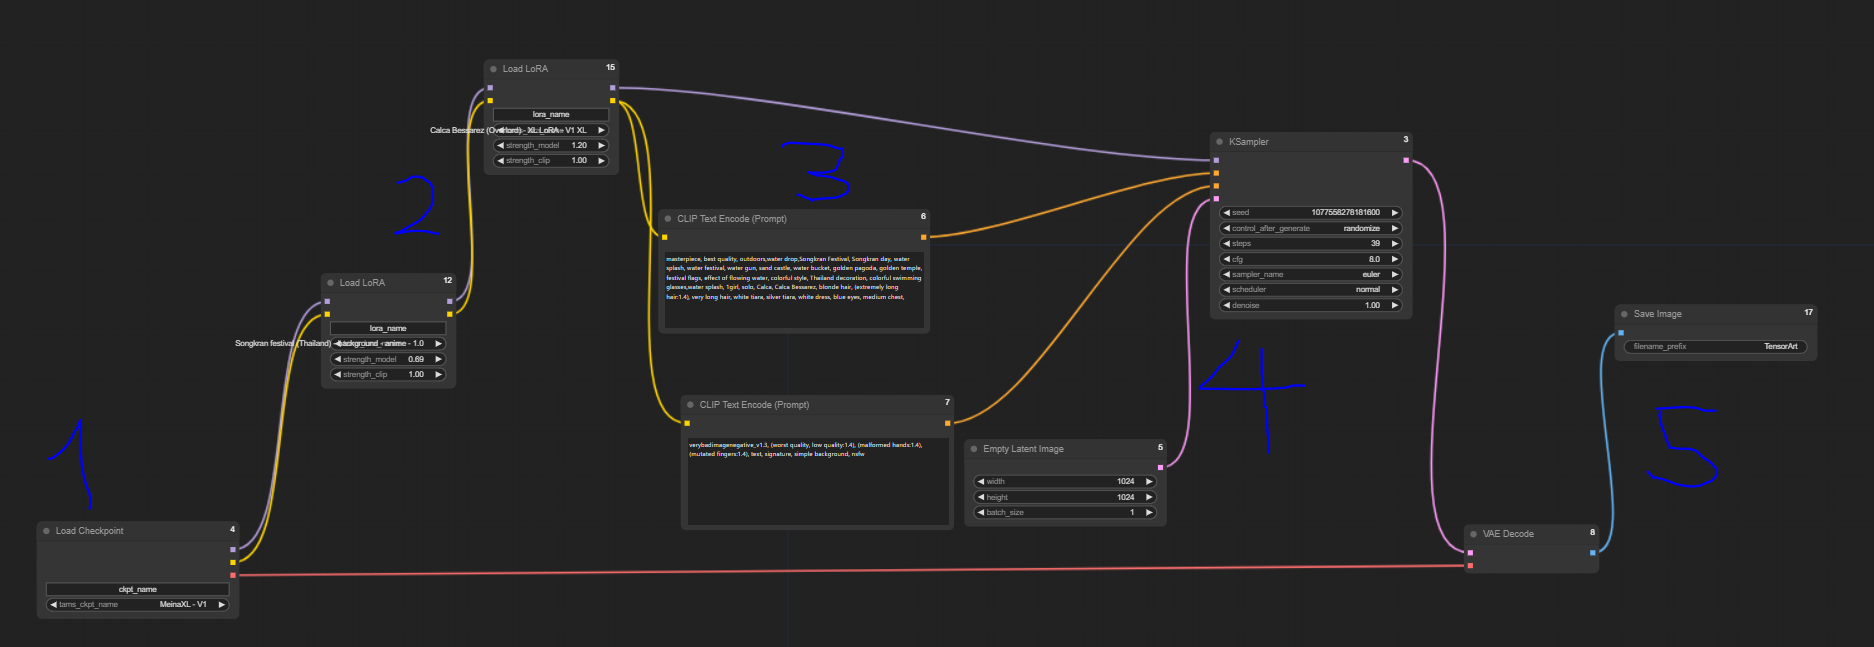
The numbers 1-5 represent the overview process of the workflow and the role of each type of node I have mentioned above. However, in the case of more complex tasks like in AI Tools, the number of nodes sometimes is higher than 30!!!!!!!
By the way, when starting with an empty ComfyFlow page, the way to add a node is "Right Click" -> "Add Node" -> Scroll down to the top, since the most frequently used node will be over there.
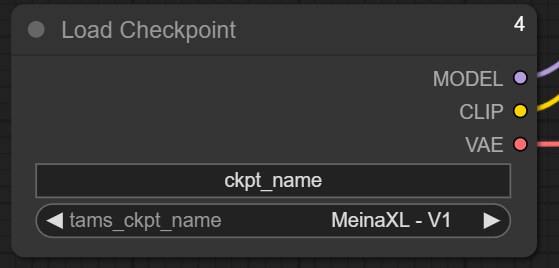
1) loaders -> Load CheckPoint
Like in the normal task creation menu, this node is the one we can choose CheckPoint or the Core model.
It is important to note that nodes work together using input/output.
The "Model/CLIP/VAE" (the output) circles have to connect to the next one in which it has to correspond. We link them together by left-clicking on the circle's inner area and then drag to the destination.
PS. CLIP (Contrastive Language-Image Pre-training) is a model developed by OpenAI that links images and text together in a way that helps AI understand and generate images based on textual descriptions.
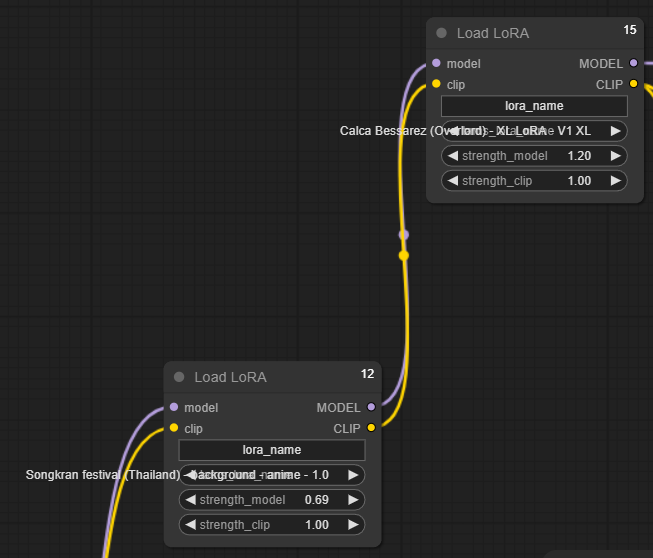
2) loaders -> Load LoRA
Checkpoint is very closely related to LoRA and that is a reason why they are connected by the input/output named "model/MODEL", "clip/CLIP"
Anyway, since in this example, I have used 2 LoRAs (first for The theme of the picture and the Second for the character reference of my Waifu), two nodes of LoRAs then have to be connected as well.
Here we can adjust the strength of the LoRA or the weight like it happens in the normal task generation menu.
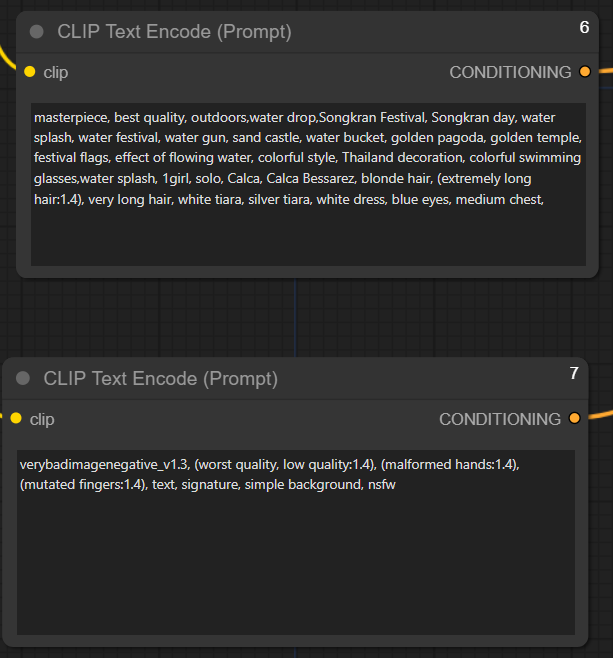
3) CLIP Text Encode (Prompt)
This node is the prompt and negative prompt we normally see in the menu. The input here is only clip (Contrastive Language-Image Pre-training) and the output is "CONDITIONING"
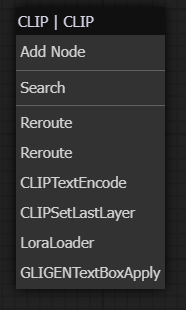
User tip: If you click on the output circle of the "Load LoRA" node and drag it to the empty area, the ComfyFlow will pop up a corresponding next node list to create a new one with ease.
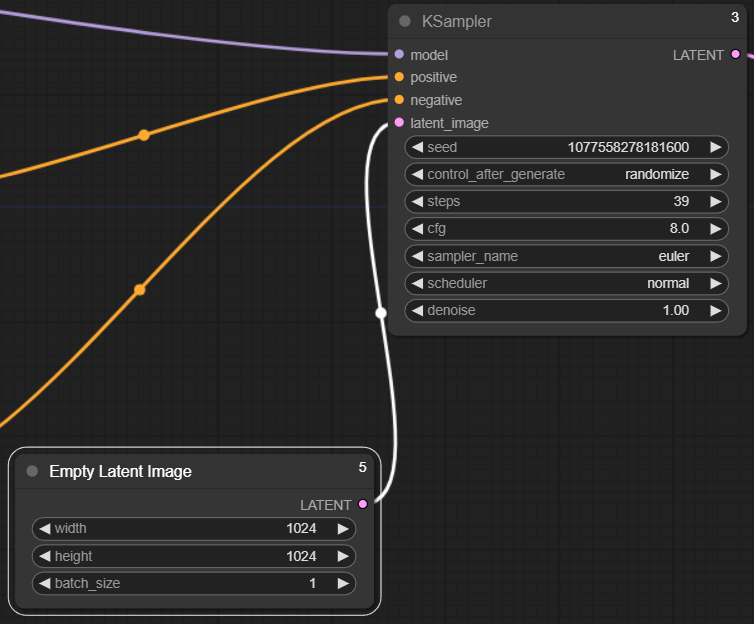
4) KSampler & Empty Latent Image
The sampling method is used to tell the AI how it should start generating visual patterns from the initial noise and everything associated with its adjustment will be set here in this type of sampling node together with "Empty Latent Image"
The inputs in this step here are models (from LoRA node), positive and negative (from prompt node) and the output is "Latent"
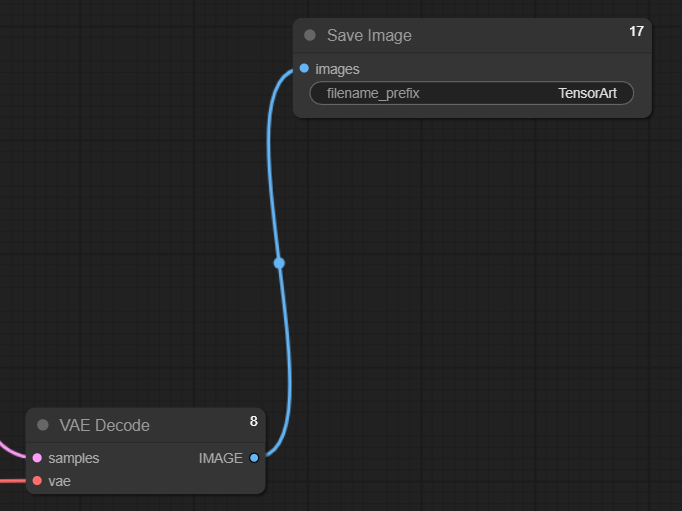
5) VAE Decode & Final output node
Once we establish the sampling node, the output named "LATENT" will then have to connect with "samples" Meanwhile the "vae" is the linkage between this one and the "Load Checkpoint" node from the beginning.
And when everything is done the "IMAGE" as a final output here will be served at your hand.
PS. An AI Tool is a more complex Workflow created to do some specific task such as swapping the face of the human in the original picture with the target face or changing the style of the input illustration to another one and etc.