


Get more specific generations each time!
Have you ever heard of Area composition?
Area composition is a technique where you can specify and set custom locations for every element you want to generate. In order to create this simple but effective workflow all you need is:
Nodes
Load checkpoint: here you select your desired model.
Load LoRA: here you select your desired style with any LoRA (this one is optional).
Clip Set Last Layer: this node works as your Clip Skip (set it to -2 for better results).
Clip text encode: here is where your lovely prompt will be. you will need to have two of these because one will work as your positives and the other as negatives.
Ksampler: this node is important because it is like the brain of the main process. here is where your prompt and image size gets read it and transformed into an image. here you can use the sampler and scheduler you like the most (set the denoise strength to 1.0 for better results).
Empty latent image: as important as the ksampler, the empty latent image node is where you decide the specific size of your initial image (can be portrait or landscape).
Clip text encode: wait, again? yes. just as the last ones, this node will focus on the specific element you want to generate. it is important to keep it simple and only consider the main element to represent (you can have as many nodes for every element you want to generate. keep in mind that these nodes will only work as positives. for this example i will only use 2 clip text encode nodes).
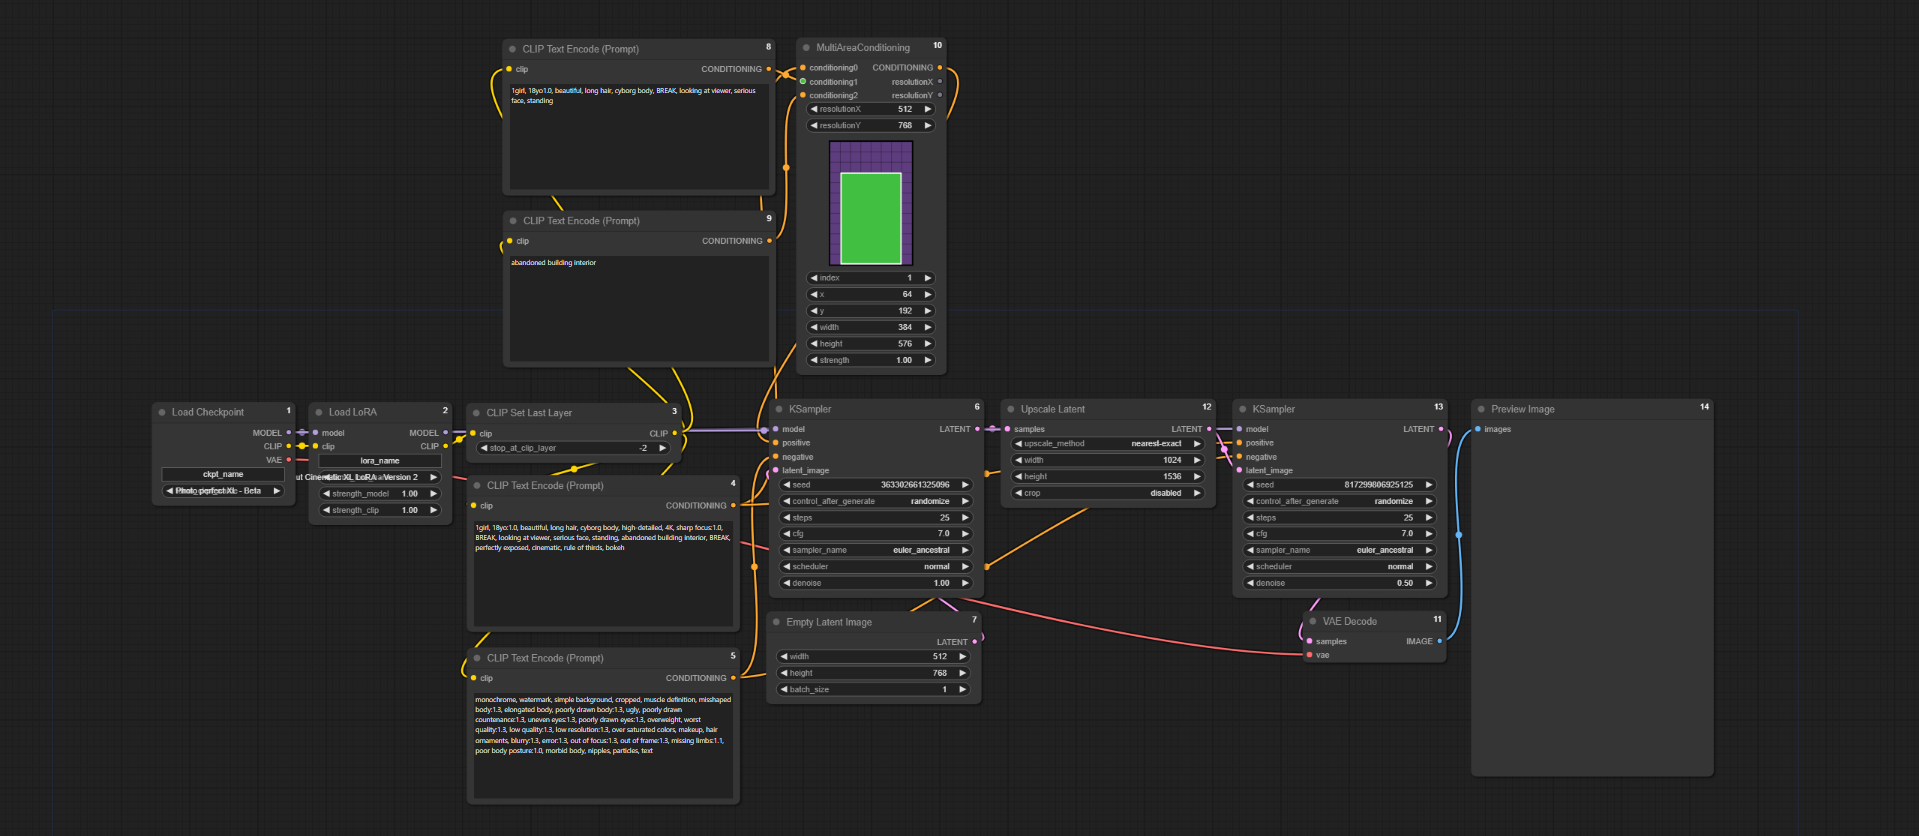
MultiArea conditioning: ok so, this is the most important node of the process. here, for explaining purposes, i will call each one of my positives as conditionings.
conditioning 0 will be my first positive (the one i made on step 4).
conditioning 1 and 2 will be my second and third positive (the one i made on step 7).
it is very important to know that for each conditioning you will have to set a desired size for each element. in this example conditioning 0 i set it to 512x718 because is the base prompt and i want all of the canvas to represent it. for conditioning 1, which is my main character, i set it to 384x576 on lower part of the center of the canvas. and for conditioning 2, which is the background /setting, i set it to 512x718 because i want all of the canvas to work as the background. (you may notice that for each conditioning, while setting it's position, a different color will show on the multiarea conditioning node. keep calm, these colors will work just as a visual representation for the position of each element).
also important, as you have figured it out, this node works just as a super detailed composition instruction, therefore, this multiarea conditioning node will work as your positive, so be sure to connect it as positive in your ksampler.
Upscale latent: until this part of the process we have only created the base image, which means it is time to upscale it. to do so, i have used the upscale latent node. it not only upscale the image to a desired size but also introduces more detail in the process.
Ksampler: yes, again. this second ksampler will work along the upscale latent node in order to refine details, so using the same configuration as your first one (step 5) is a good idea. (lowering the denoise strength on this second ksampler will help in avoiding drastic changes. for this example i set it to 0.5).
VAE encode: the variational autoencoder or vae node is important because this node will transform the noise and commands into your beautiful masterpiece.
Preview/Save image: lastly, what is left to add is the preview/save image node. (this one does not need an explanation, right?).
And there you go, you will now be able to generate more personalized images.
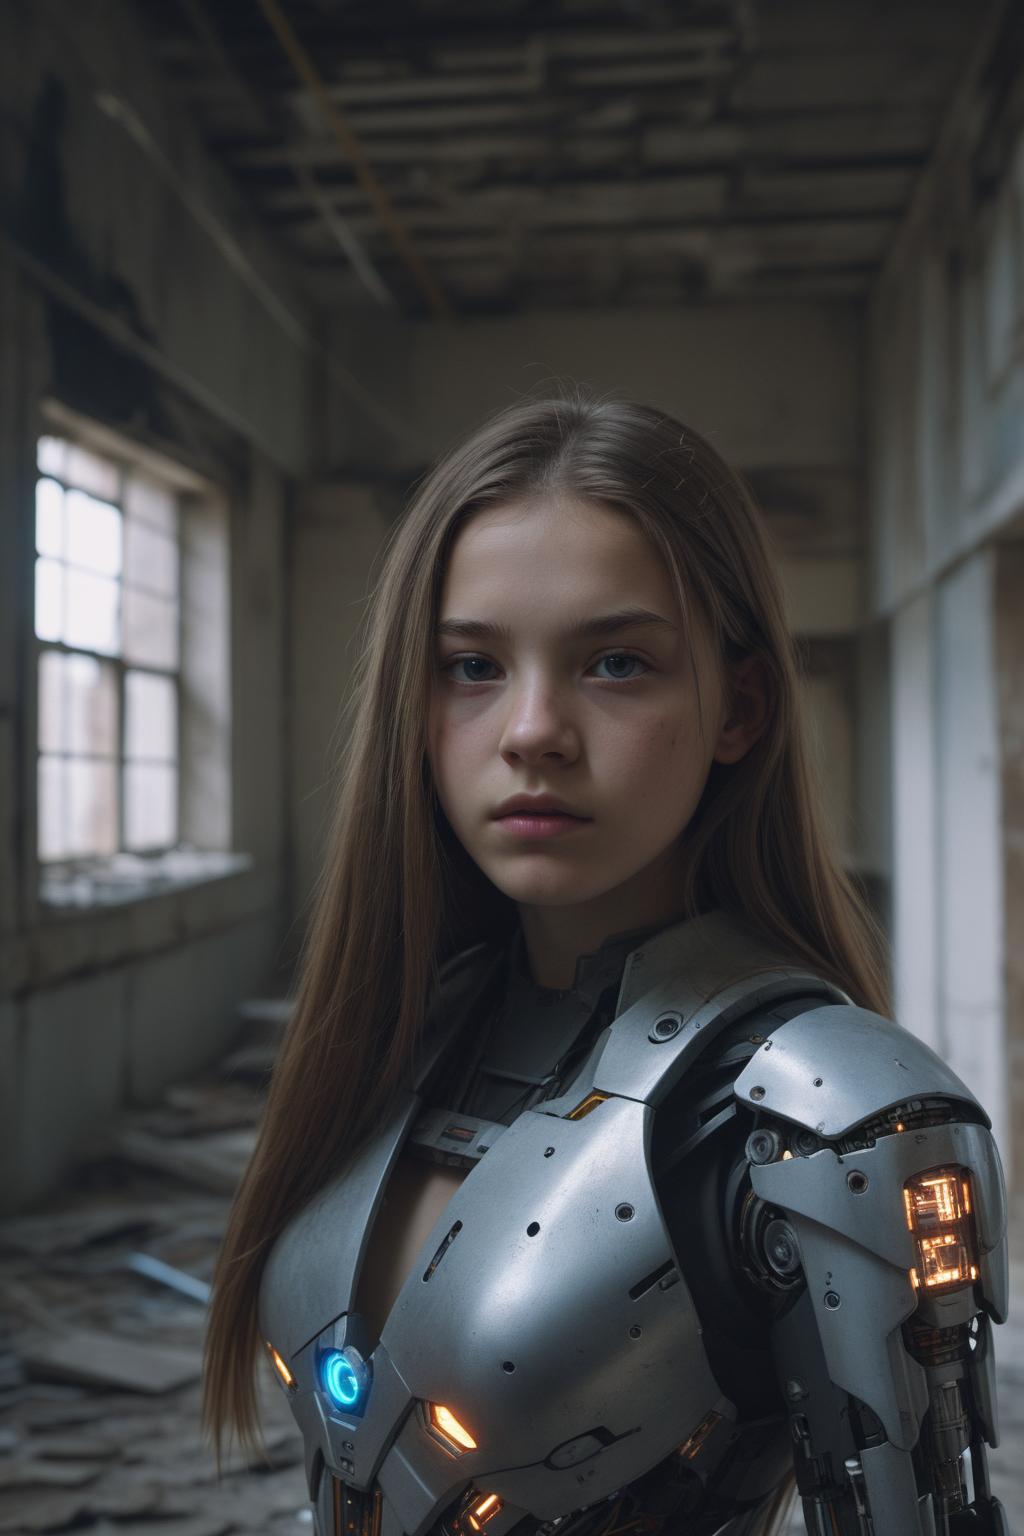
Intended image to create: cyborg girl inside abandoned building.
Do not forget to set this article as favorite if you found it useful.
Happy generations!