


Hello! This is my first article; I hope it will be of benefit to the person who reads it. I still have limited knowledge about WorkFlow; but I have researched and learned little by little. If anyone would like to contribute some content; you are totally free to do so. Thank you.
I made this article to give a brief and basic explanation about basic concepts about Comfyui or WorkFlow. This is a technology with many possibilities and it would be great to make it easier to use for everyone!
What is Workflow?
Workflow is one of the two main image generation systems that Tensor Art has at the moment. It corresponds to a generation method that is characterized by a great capacity to stimulate the creativity of the users; also, it allows us to access to some Pro features being Free users.
How do I access the WorkFlow mode?
To access the WorkFlow mode, you must place the mouse cursor on the “Create” tab as if you were going to create an image by conventional means. Once you have done that; click on the “ComfyFlow” option and you are done.
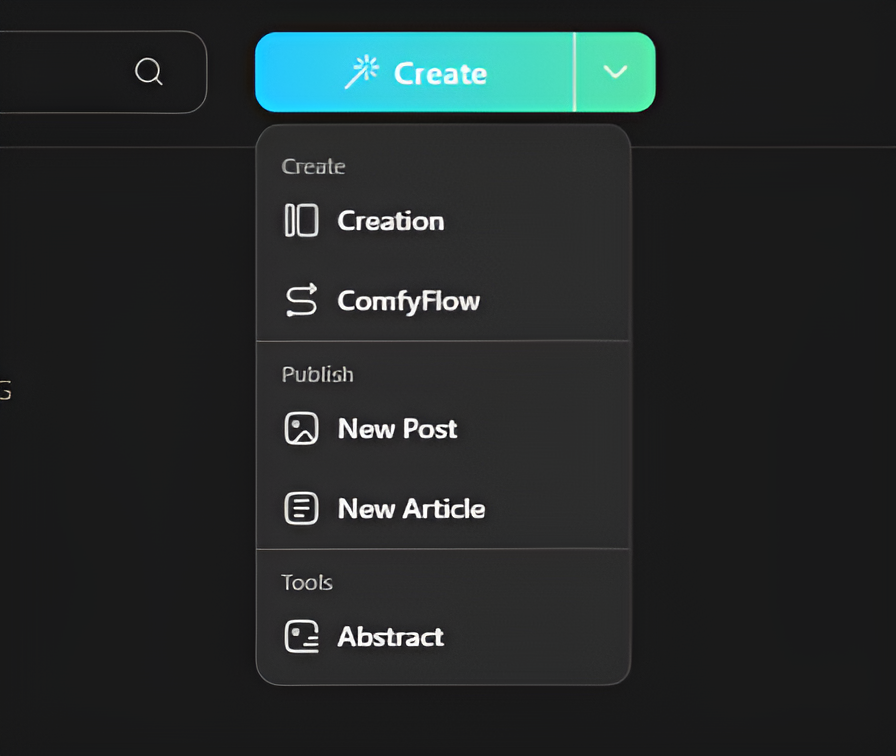
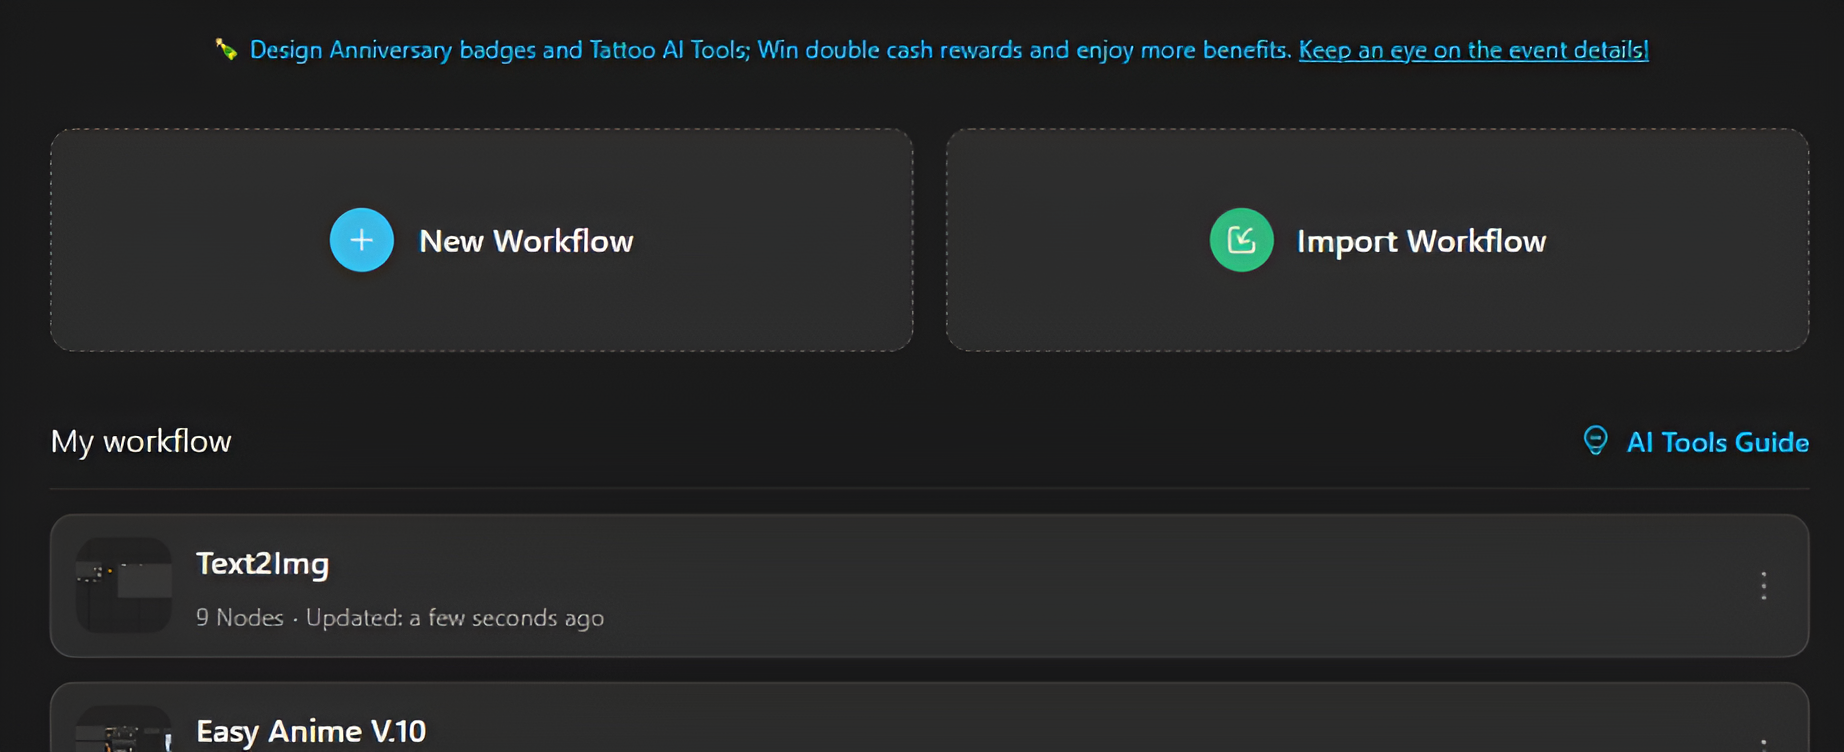
After that, you will see a tab with two options “New WorkFlow” and “Import WorkFlow”. The first one allows you to start a workflow from a template or from scratch; while the second option allows you to load a workflow that you have saved on your pc in a JSON file.
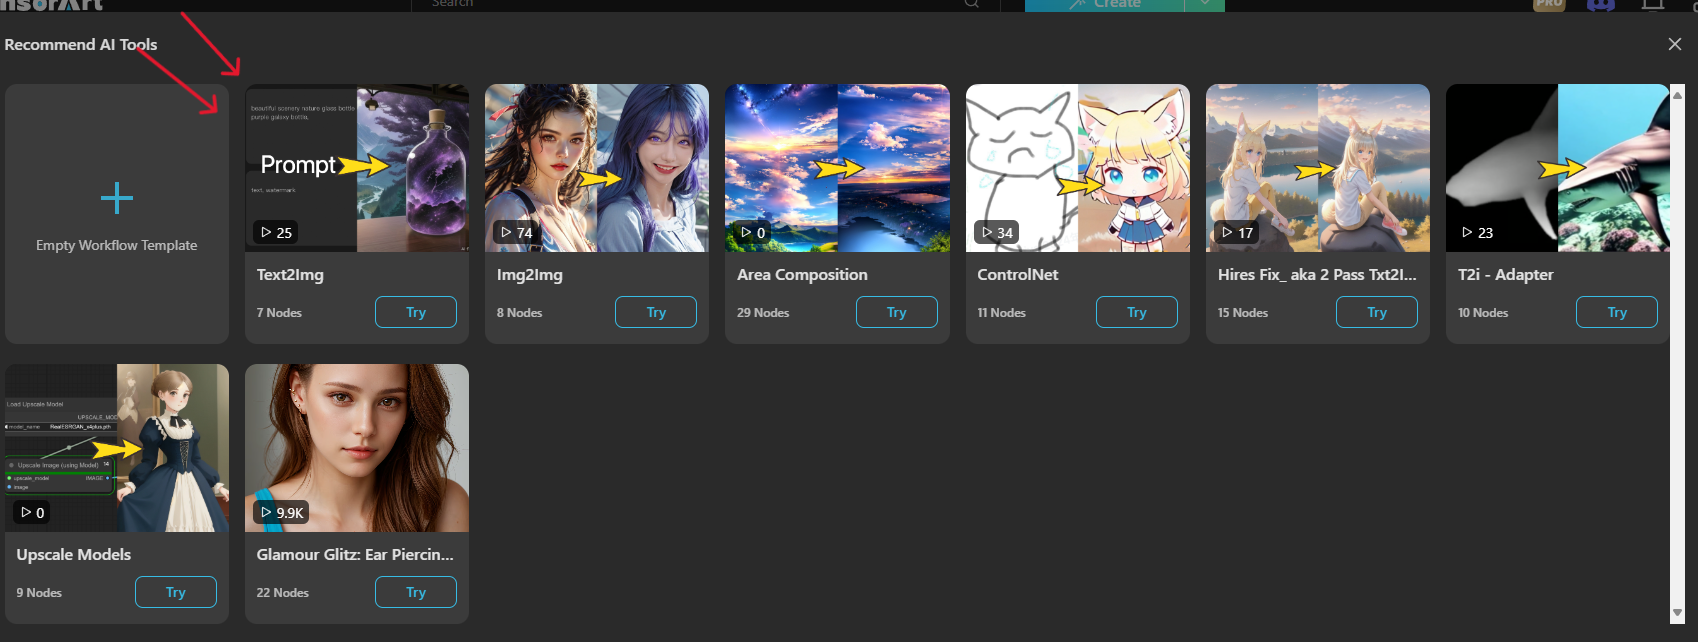
If you click on the “New WorkFlow” option, a tab with a list of various templates will be displayed (each template will have a different purpose). But the main one will be “Text2Image”; it will allow us to create images from text, similarly to the conventional method we always use. You can also create a workflow from scratch in the “Empty WorkFlow Template” option but for a better explanation of the basics we will use the “Text2Image”.
Once you click on the "Text2Image" option, you must wait a few seconds and a new tab will be displayed with the template, which contains the basics to create an image by means of text.
Nodes and Borders: ¿What are they and how do they work?
Well, to understand the basics of how a WorkFlow works, it is necessary to have a clear understanding of what Nodes and Border are.
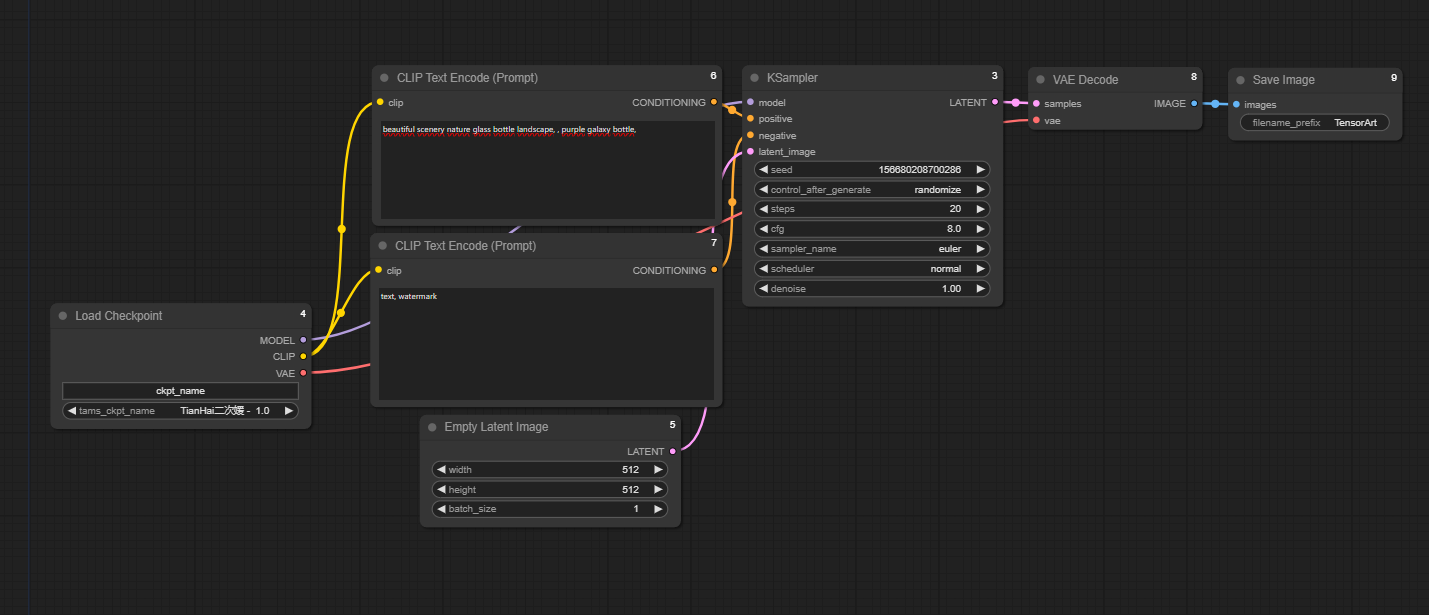
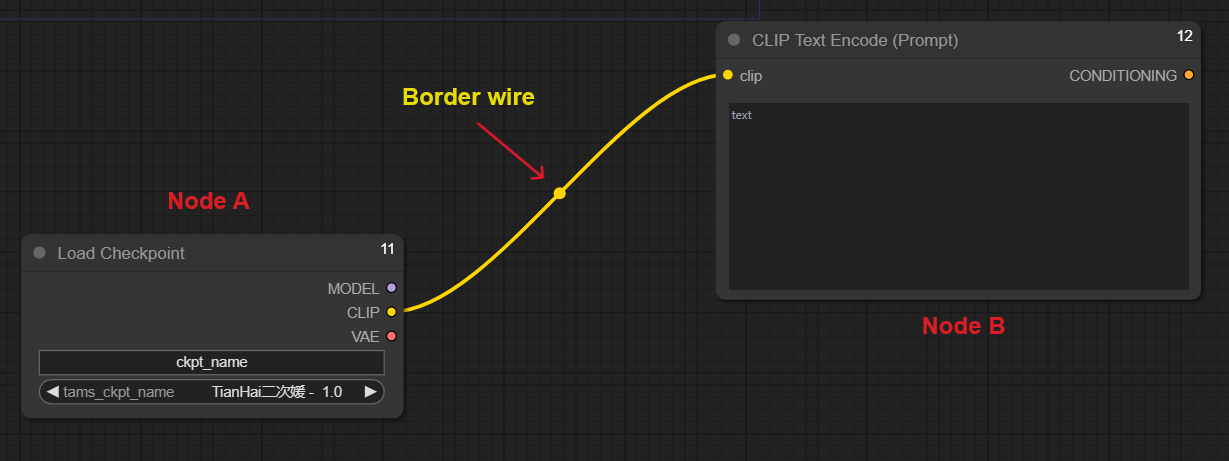
Nodes are small boxes that are present in the workflow; each node will have a specific function necessary for the creation, enhancement or editing of the image or video. The basics of Text2Image are the CheckPoint loader, the Clip Text Encoders, the Empty Lantent Image, the Ksampler, the VAE decoder, and Save Image. It should be noted that there are hundreds of other nodes besides these basics and they all have many different functions.
On the other hand, the “Borders” are the small colored wires that connect the different nodes. They are the ones that will set which nodes will be directly related. The Borders are ordered by colors that are generally related to a specific function.
The purple is related to the Model or Lora used.
The yellow one is intended for connection to the model or lora with the space to place the prompt.
The red refers to VAE.
The orange color refers to the connection between the spaces for placing the prompt and the “Ksampler” node.
The fucsia color makes allusion to the latent, which will serve for many things; but for this case it serves to connect the “Empty Latent Image” node with the “Ksampler” node and establish the number and size of the images that will be generated.
And the blue color is related to everything that has to do with images; it has many uses but this case is related to the “Save Image” node.
What are the Text2Image template Nodes used for?
Having this clear is of utmost relevance, since it allows you to know what each node of this basic template is for. It's like knowing what each piece in a lego set is for and understanding how they should be connected to create a beautiful masterpiece! Also, if you get to know what these nodes are for, it will be easier for you to intuit the functionality of its variants and other derived nodes.
A) The first one is the node called “Load Chckpoint”, this node has three specific functions. The first one is to load the base model or checkpoint with which an image will be created. The second is the Clip, which will take care of connecting the positive and negative prompts that you write to the checkpoint. And the third is that it connects and helps to load the VAE model.
B) The second one is the “Empty Latent Image”; which is the node in charge of processing the image dimensions from the latent space. It has two functions: First, set the width and length of the image; and second, set how many images will be generated simultaneously according to the “Batch Size” option.
C) The third is the two “Clip Text Enconder” nodes: in this case there will always be at least two of these nodes, since they are responsible for setting both the positive and negative prompts that you write to describe the image you want. They are usually connected to the "Load Checkpoint" or any LoRa and are also connected to the “Ksampler” node.
D) Then, there is a node “Ksampler”. This node is the central point of all WorkFlow; it is the one that sets the most important parameters in the creation of images. It has several functions: the first one is to determine which is the seed of the image and to regulate how much it changes from image to generated image by means of the “control_after_generate” option. The second function is to set how many steps are needed to create the image (you set them as you wish); the third function is to determine which sampling method is used and also what is the scheduler of this method (this helps to regulate how much space is eliminated when creating the image).
E) The penultimate one is the VAE decoder. This node is in charge of assisting the processing of the image to be generated: its main function is to be responsible for materializing the written prompt into an image. That is to say, it reconstructs the description of the image we want as one of the final steps to finish the generation process. Then, the information is transmitted to the “Save Image” node to display the generated image as the final product.
F) The last node to explain is the “Save Image”. This node has the simple function of saving the generated image and providing the user with a view of the final work that will later be stored in the taskbar where all the generated images are located.
Final Consideration:
This has been a small summary and explanation about very basic concepts about ComfyUI Mode; you could even say that it is like a small glossary about general terms. I have tried to give a small notion that tries to facilitate the understanding of this image generation tool. There is still a lot to explain, but I will try to cover all the topics; the information would not fit in a single article (ComfyUI is a whole universe of possibilities).
¡Thank you so much for taking the time to read this article!